B

B Site

2 Smokes · 1 Flash
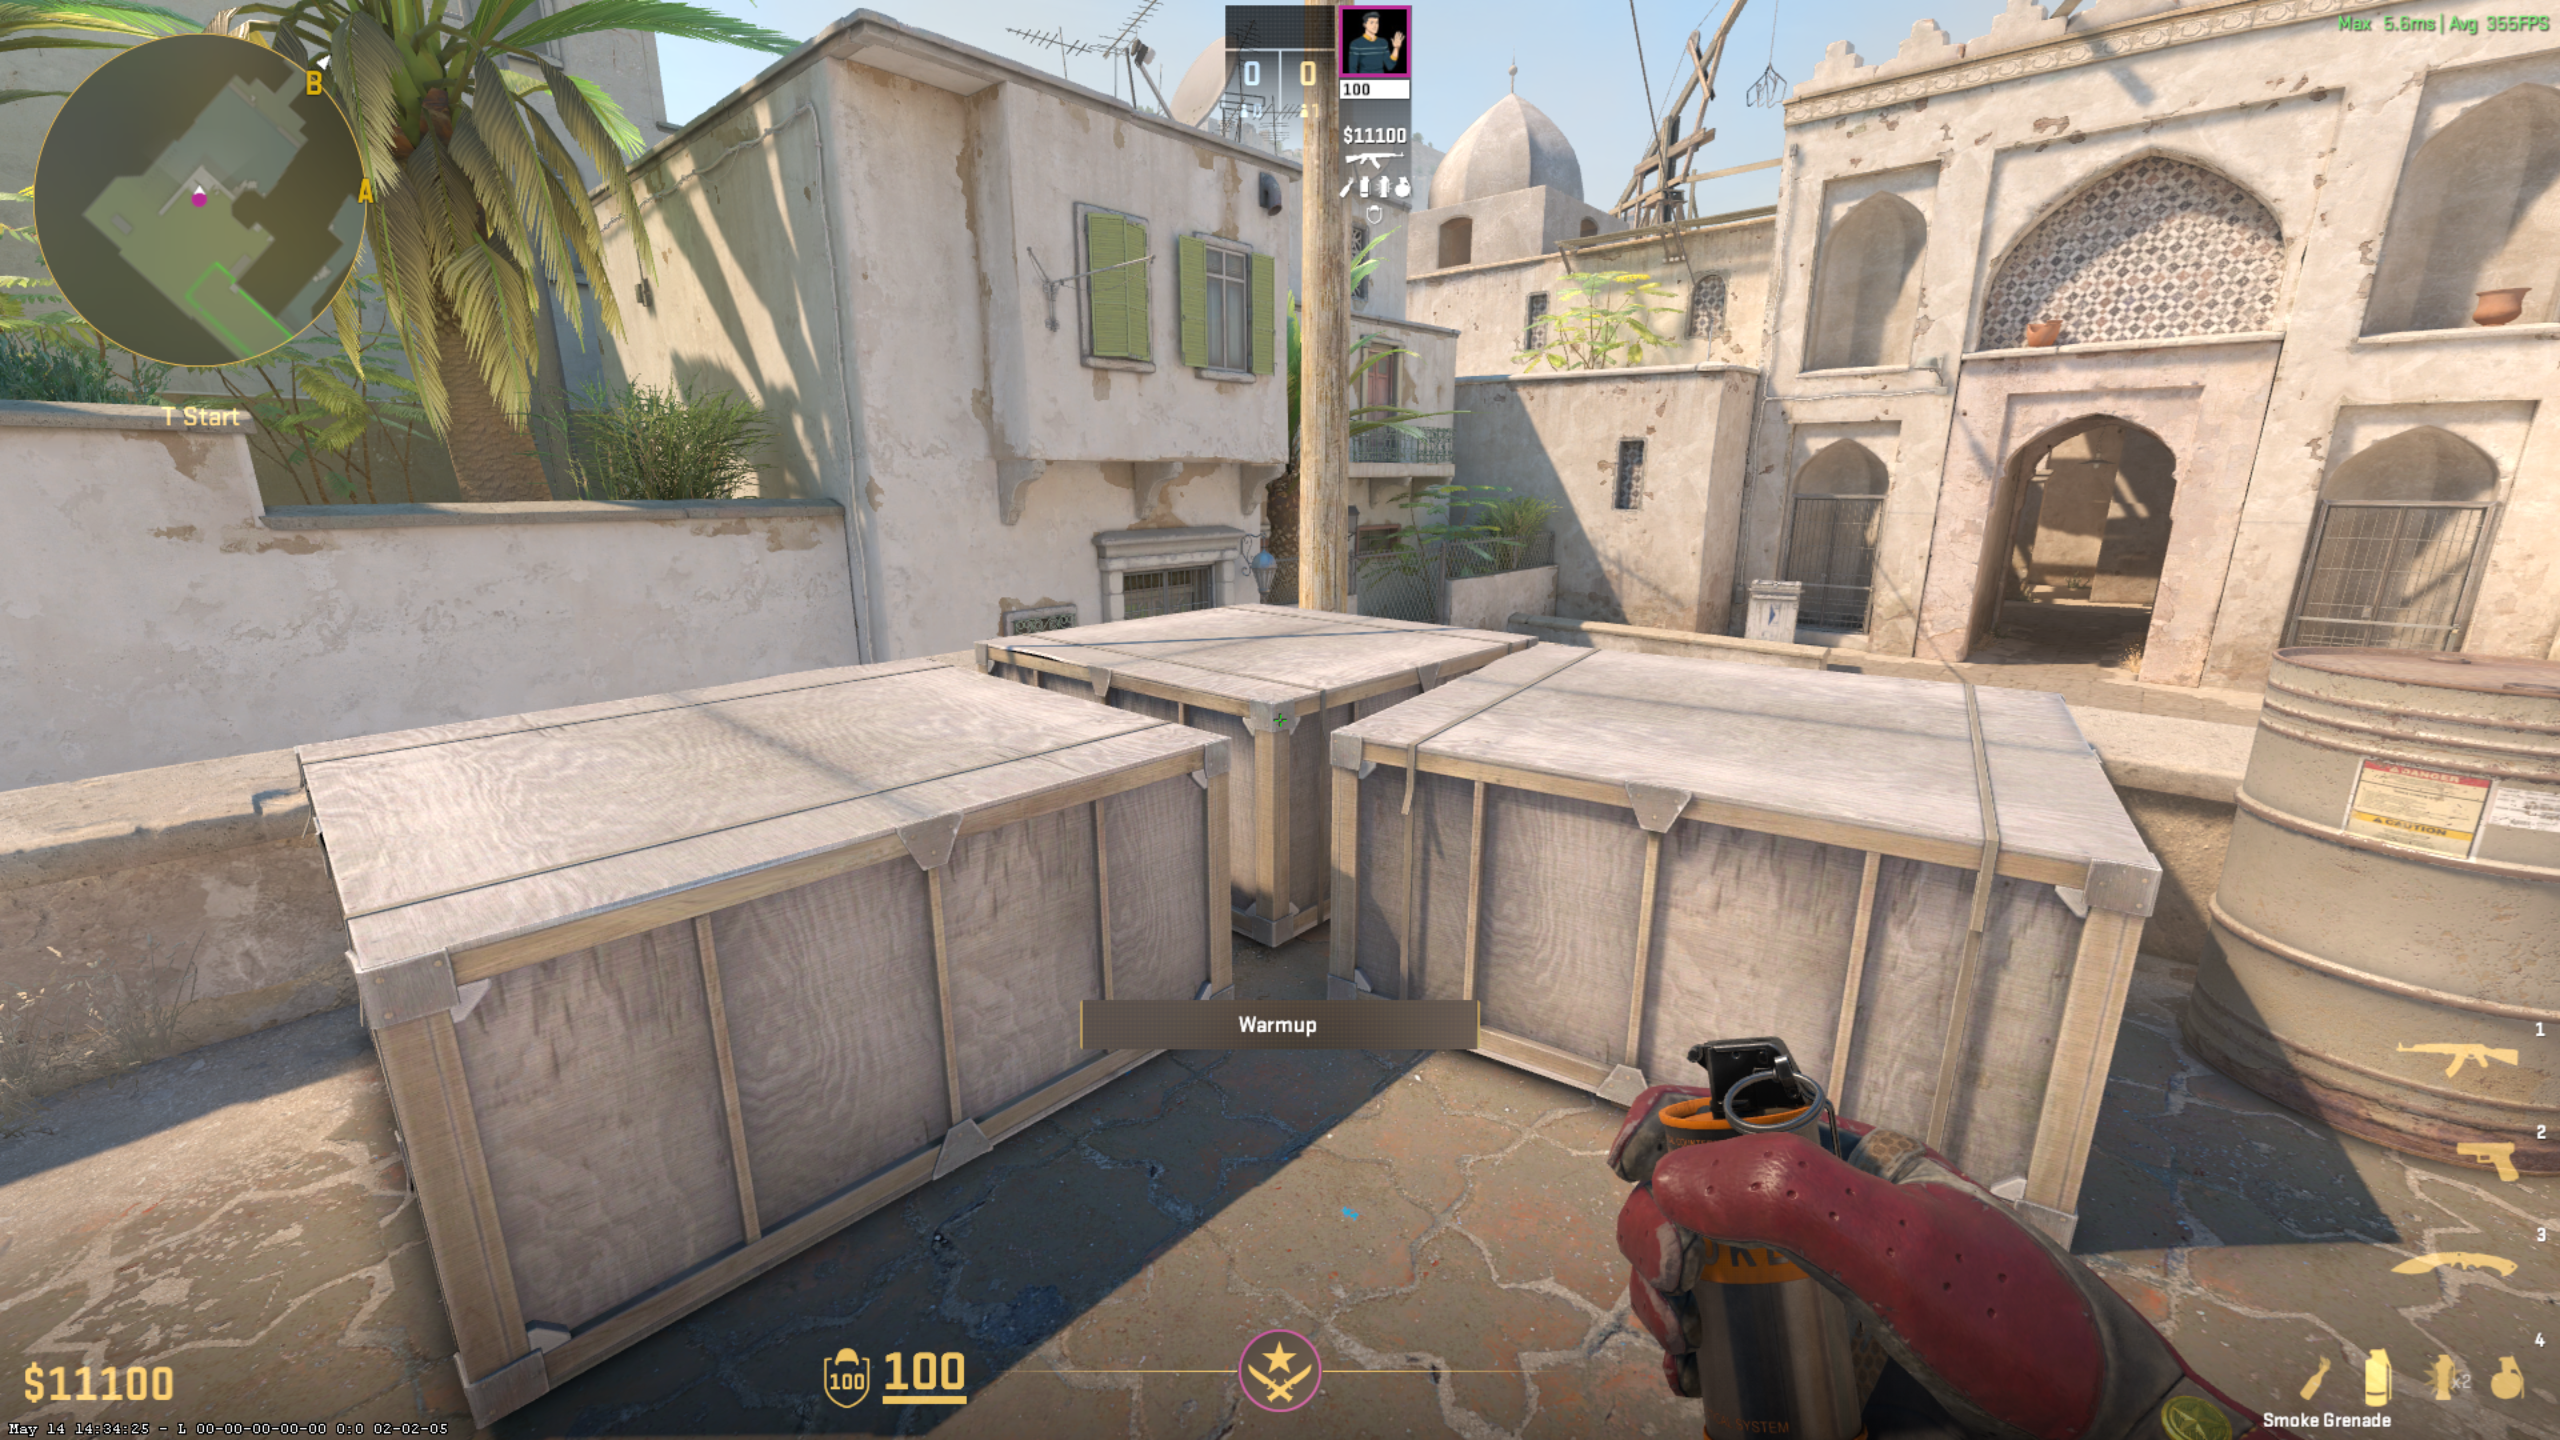
📍 T Spawn boxes
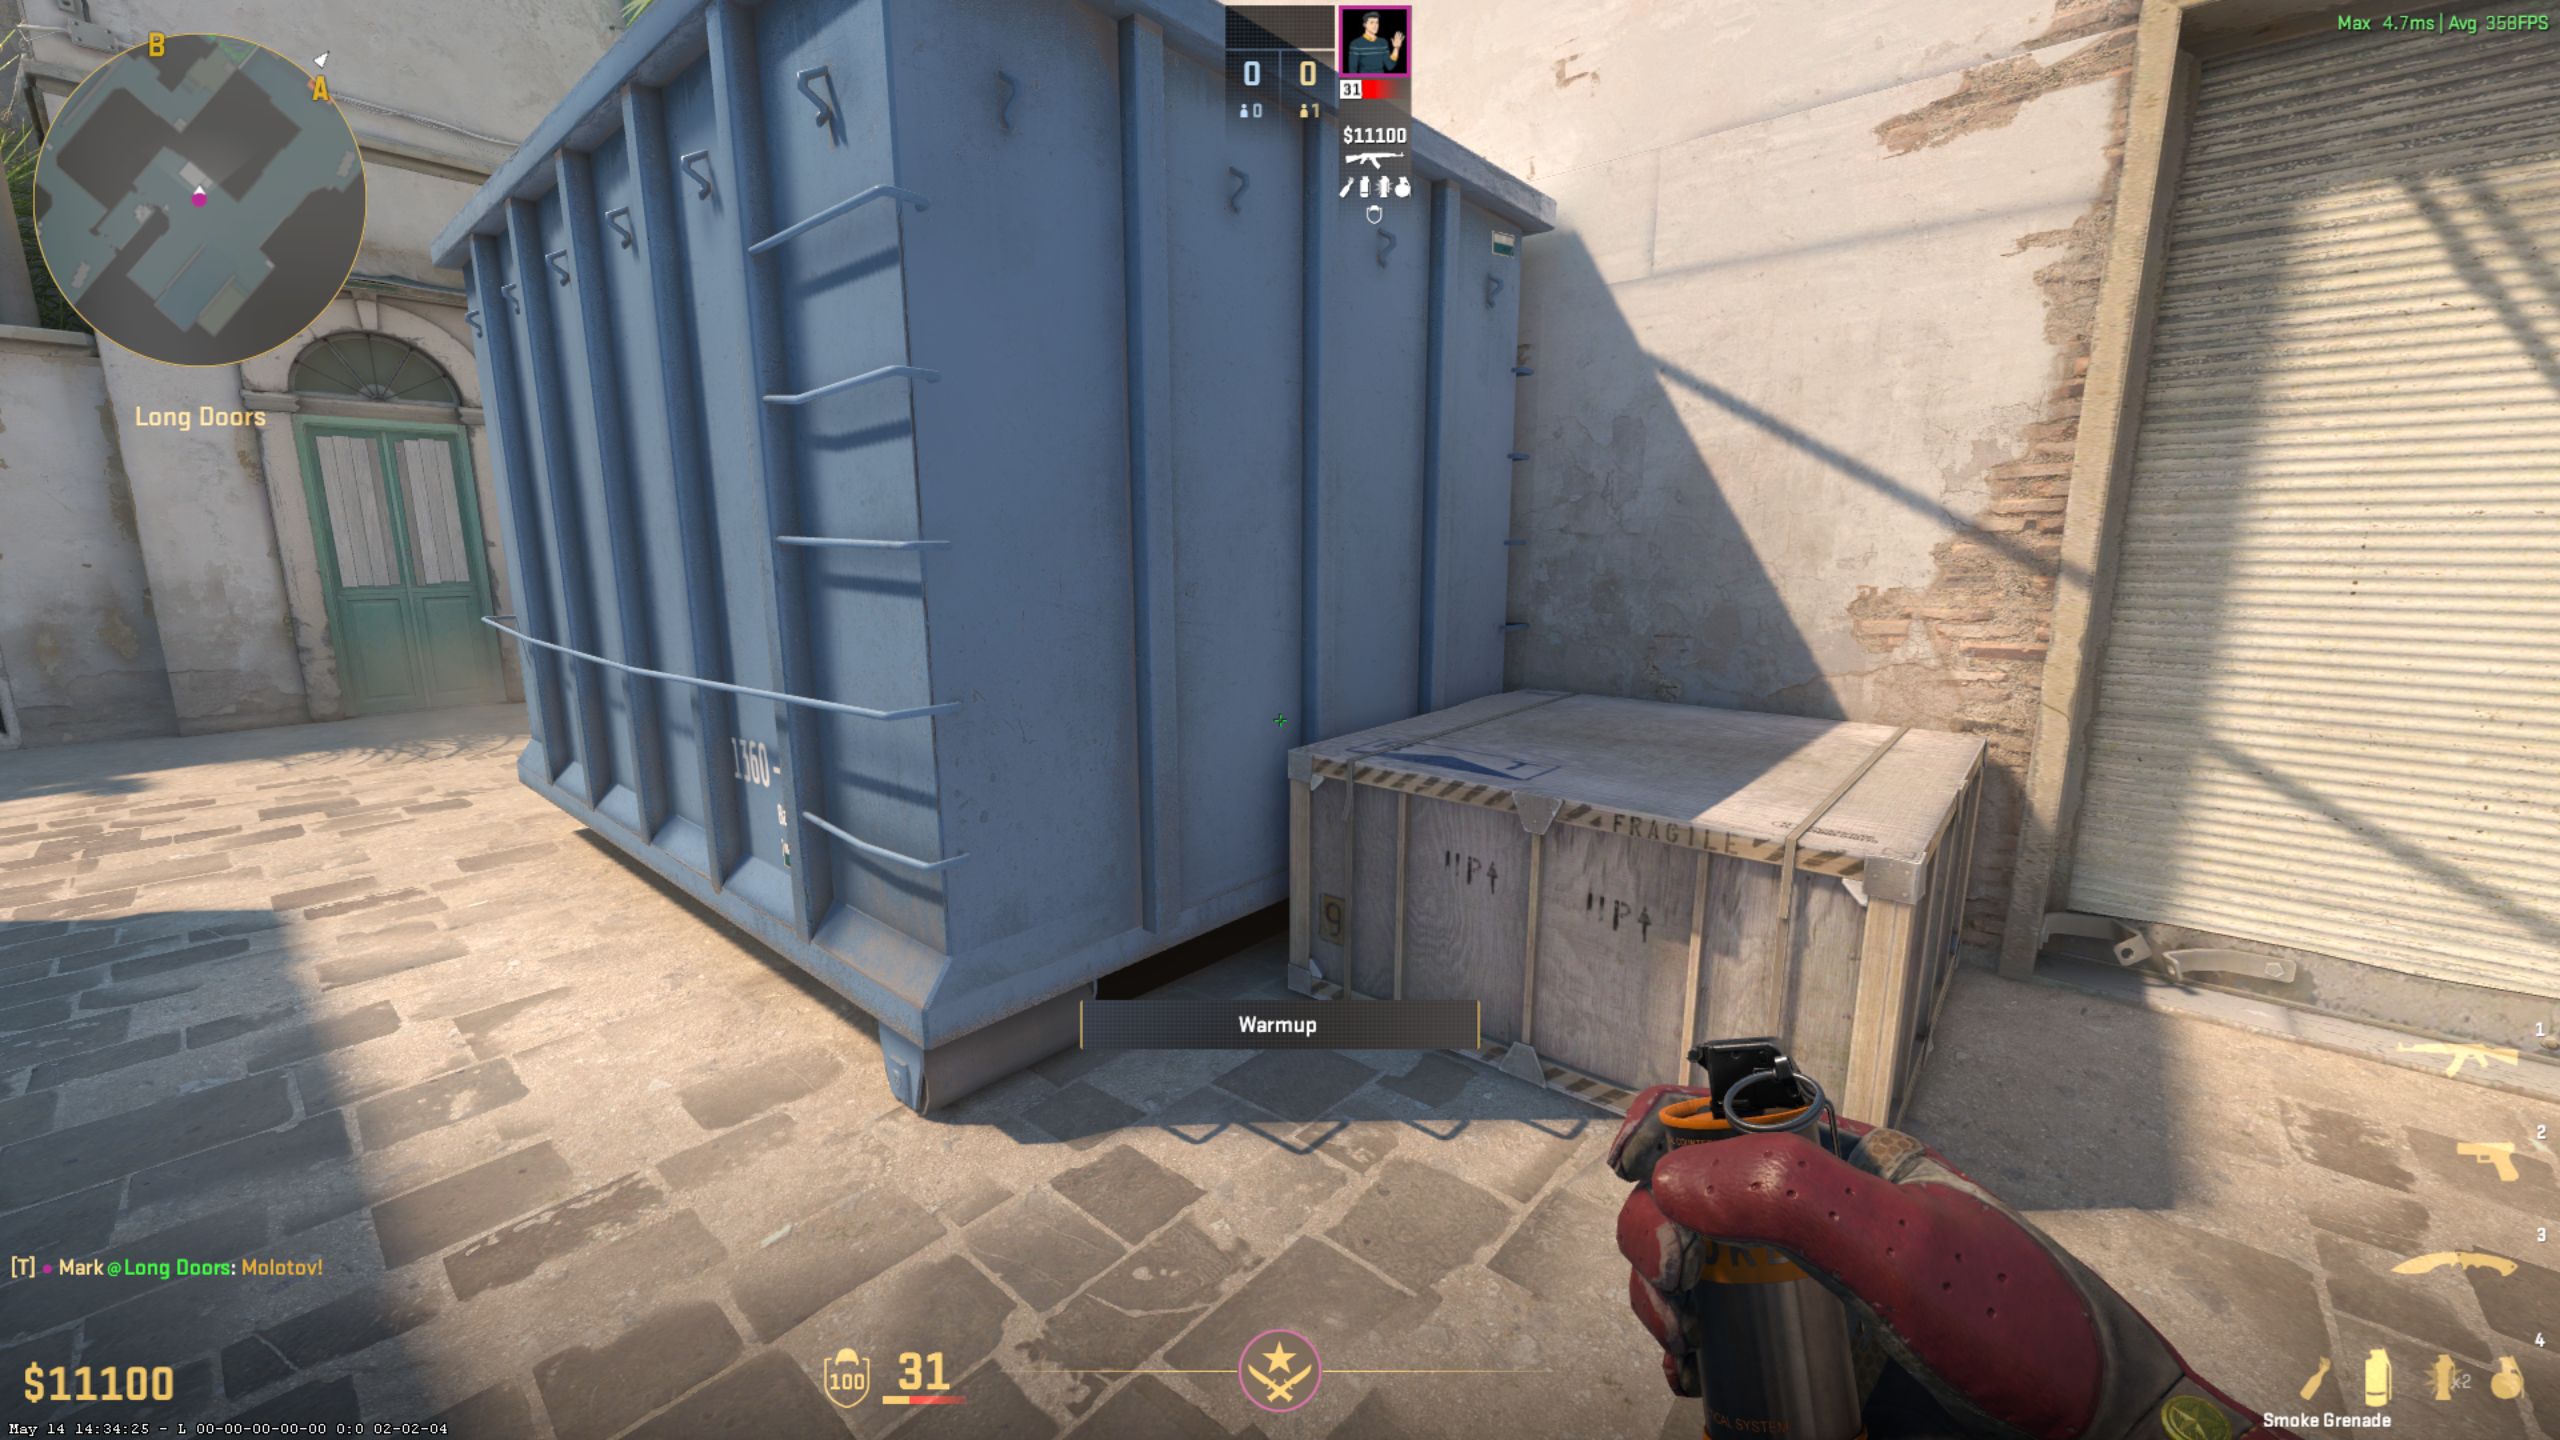
📍 Smoke stand position — tuck into the corner of the two boxes
B site smoke position
🖼️
Save as b-site-pos.png
1
Smoke
B Door
Jump Throw
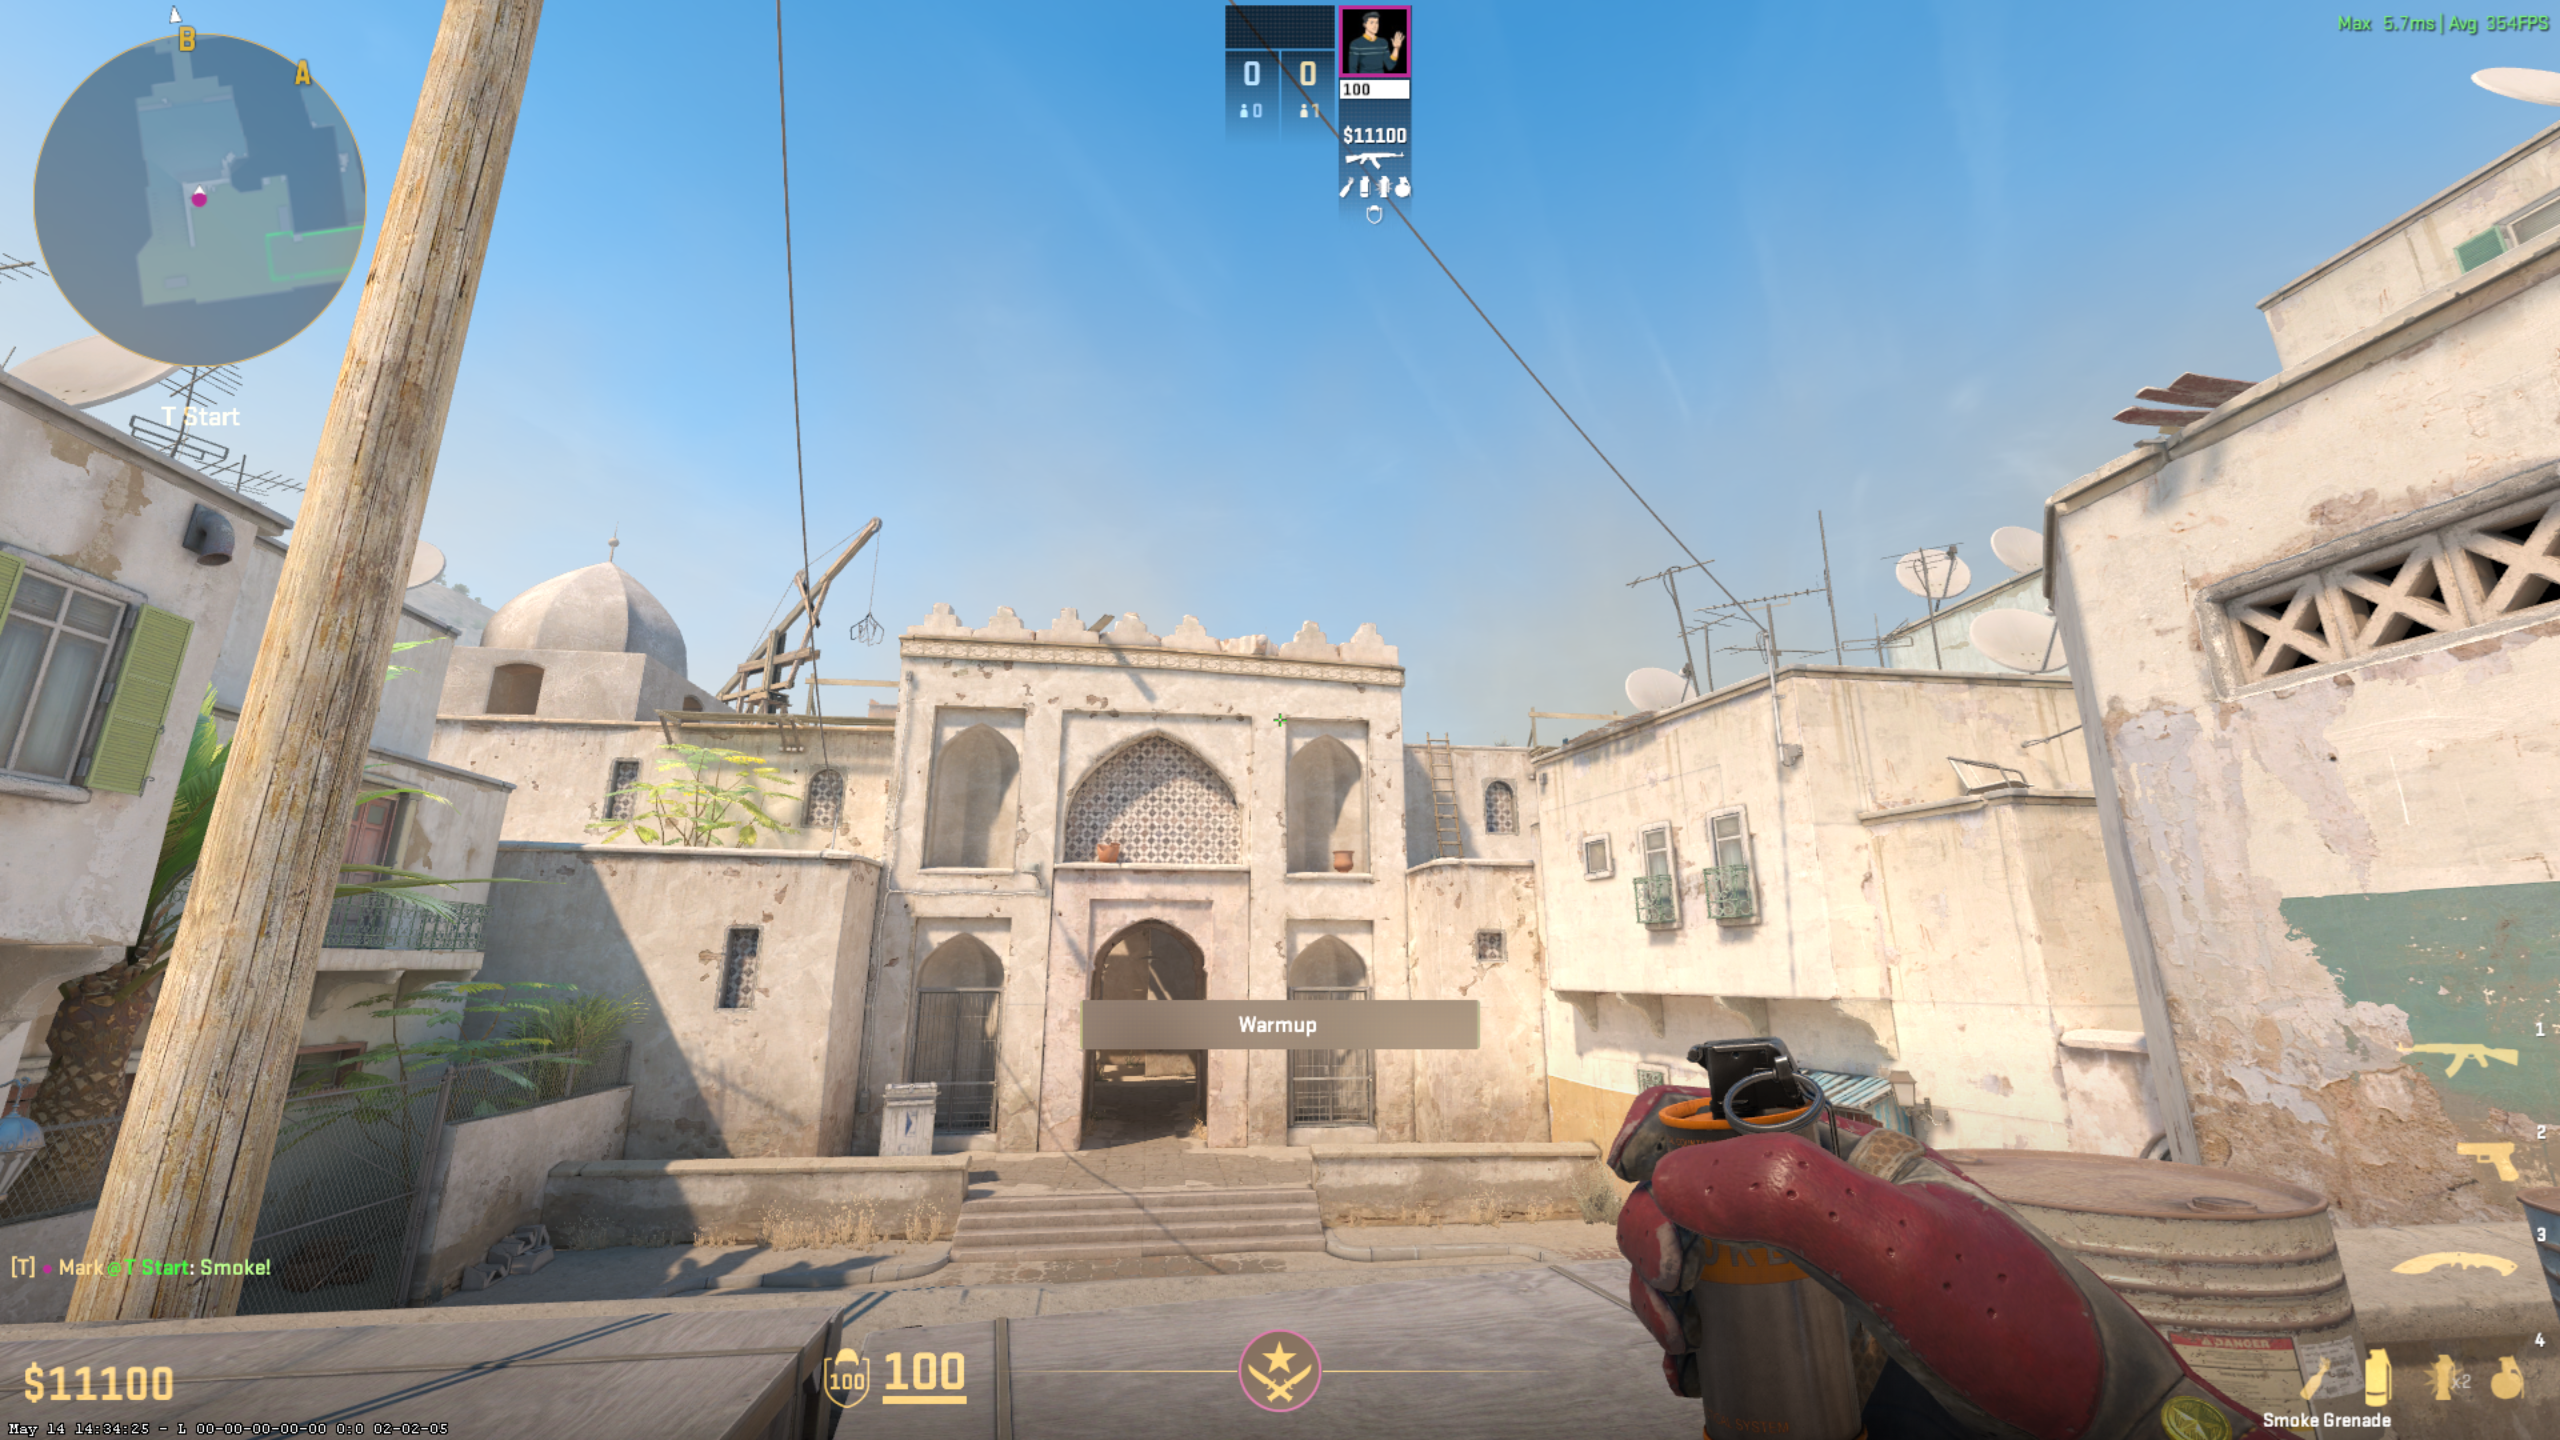
B Door Smoke
🖼️
Save as b-smoke1.png
🔍 Aim zoom
Stand
T Spawn boxes — tuck into the corner where both crates meet
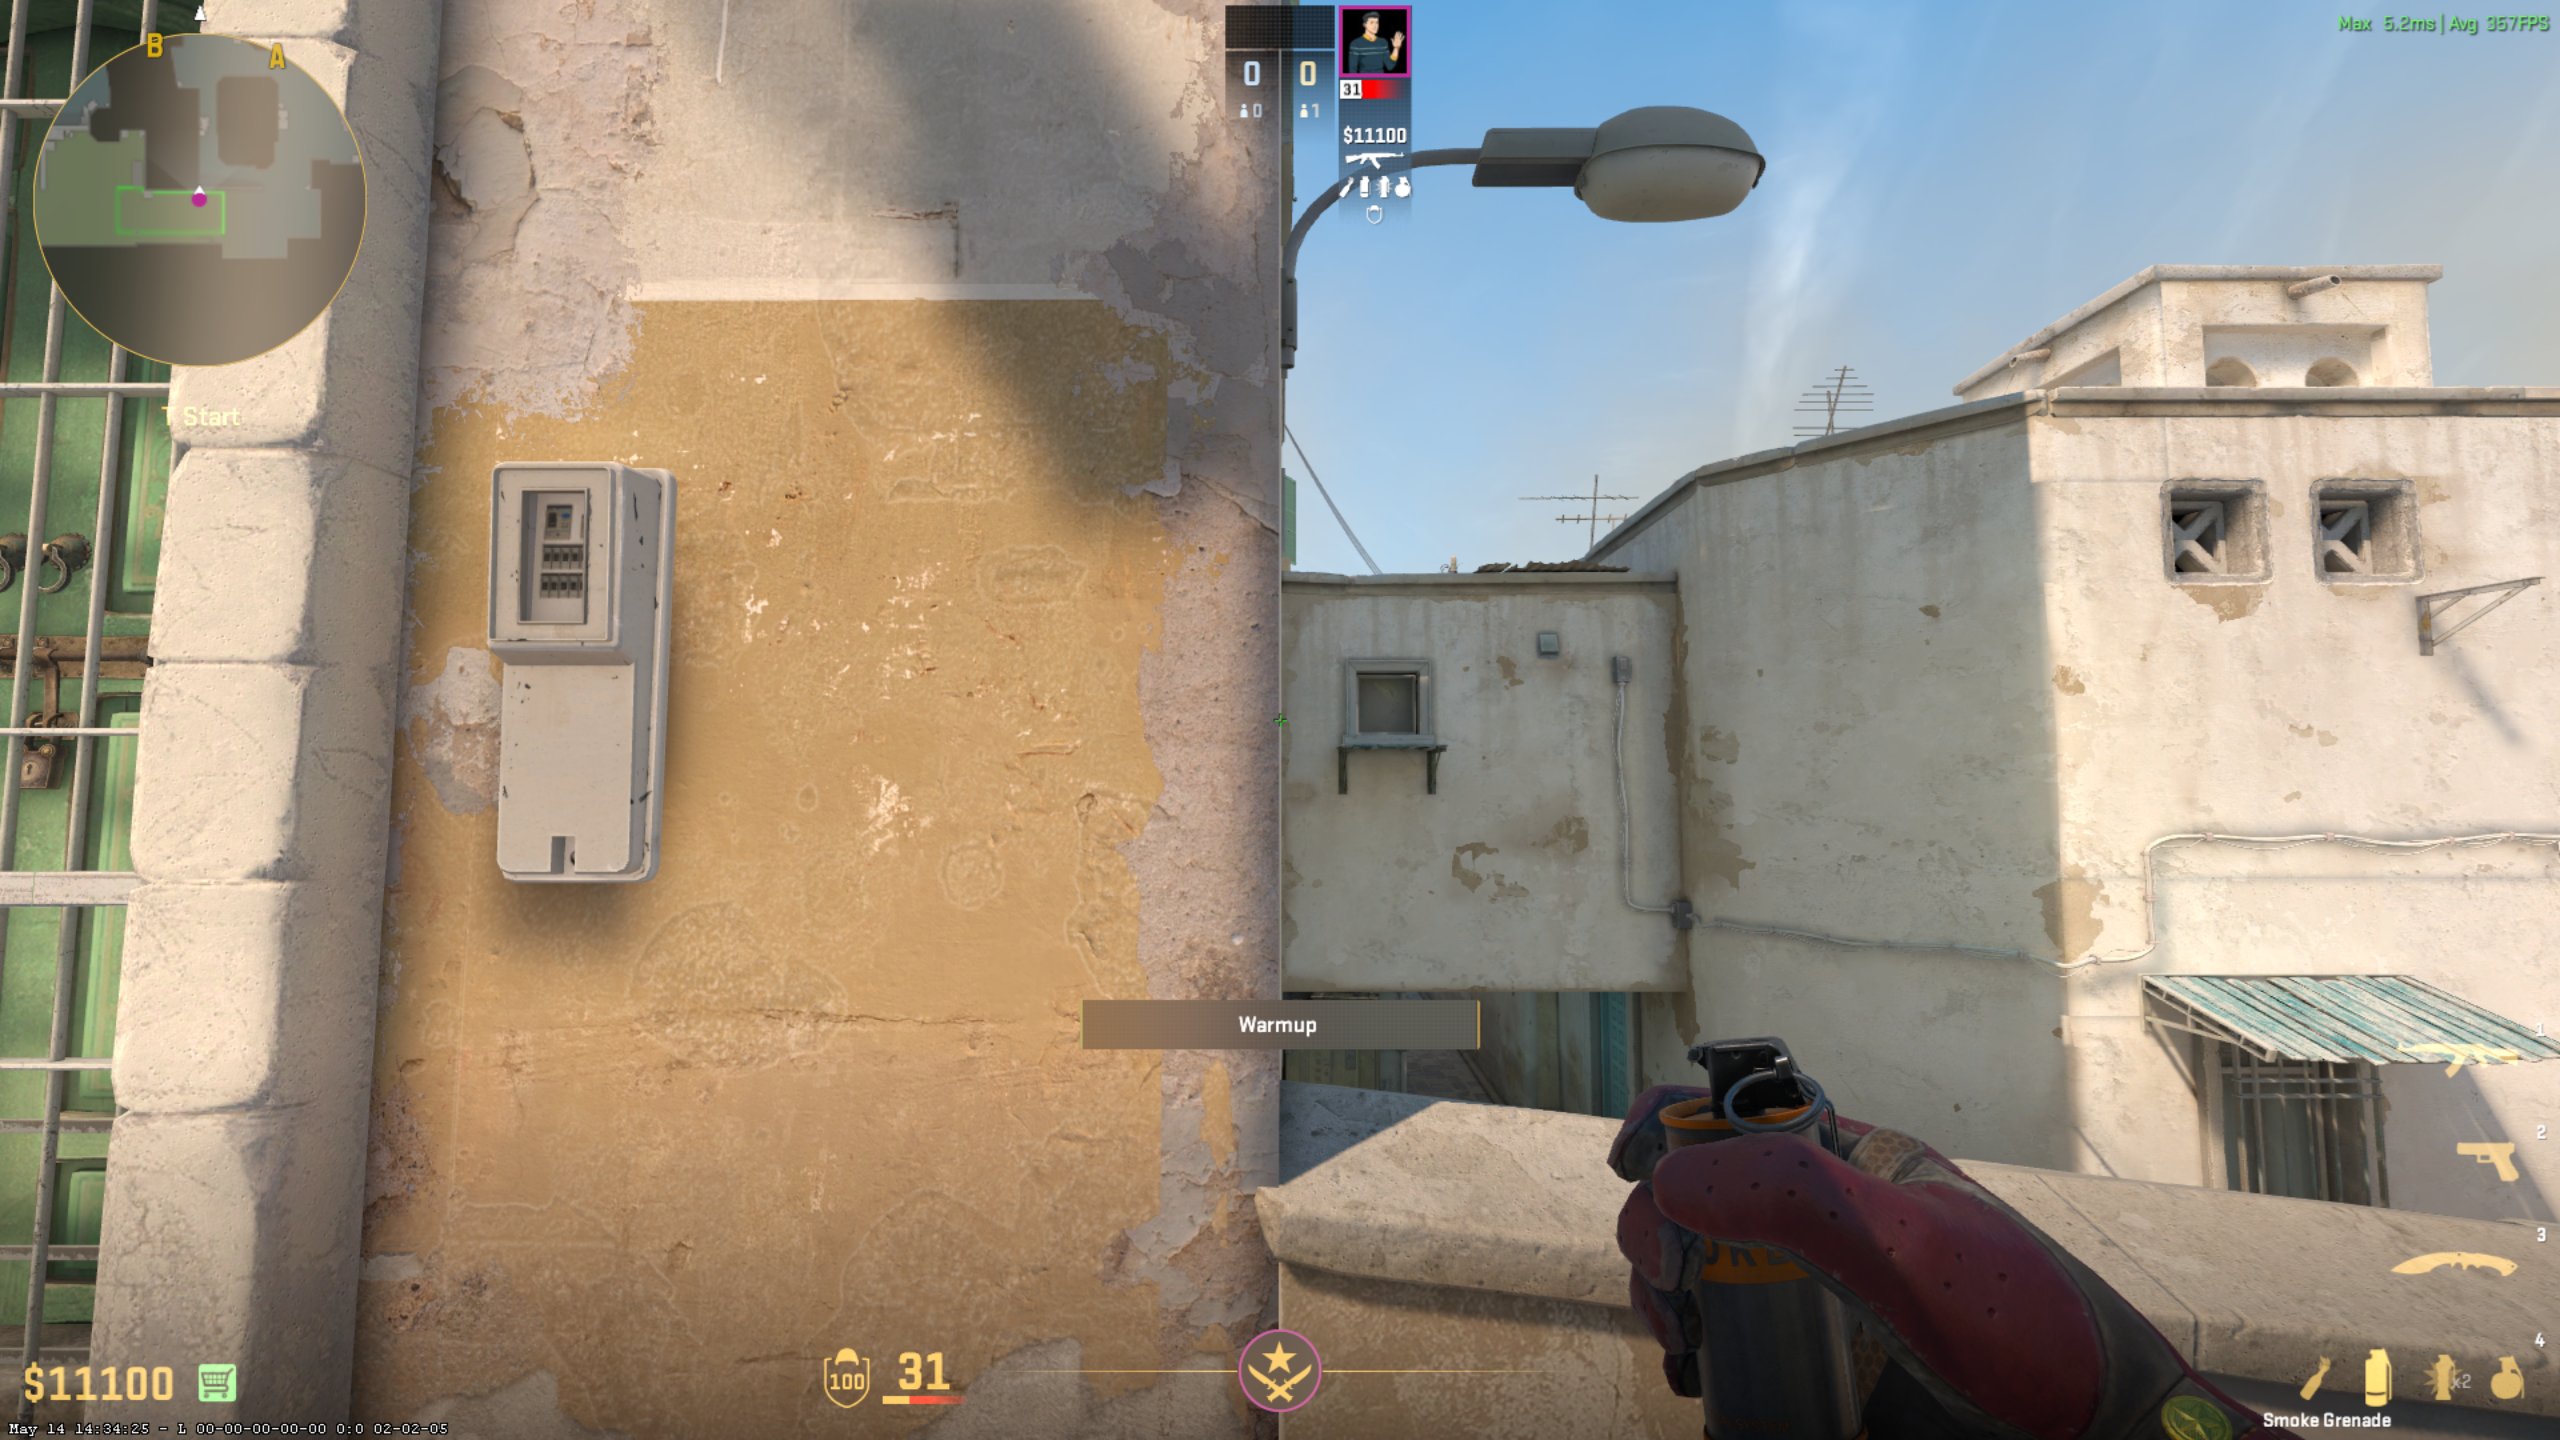
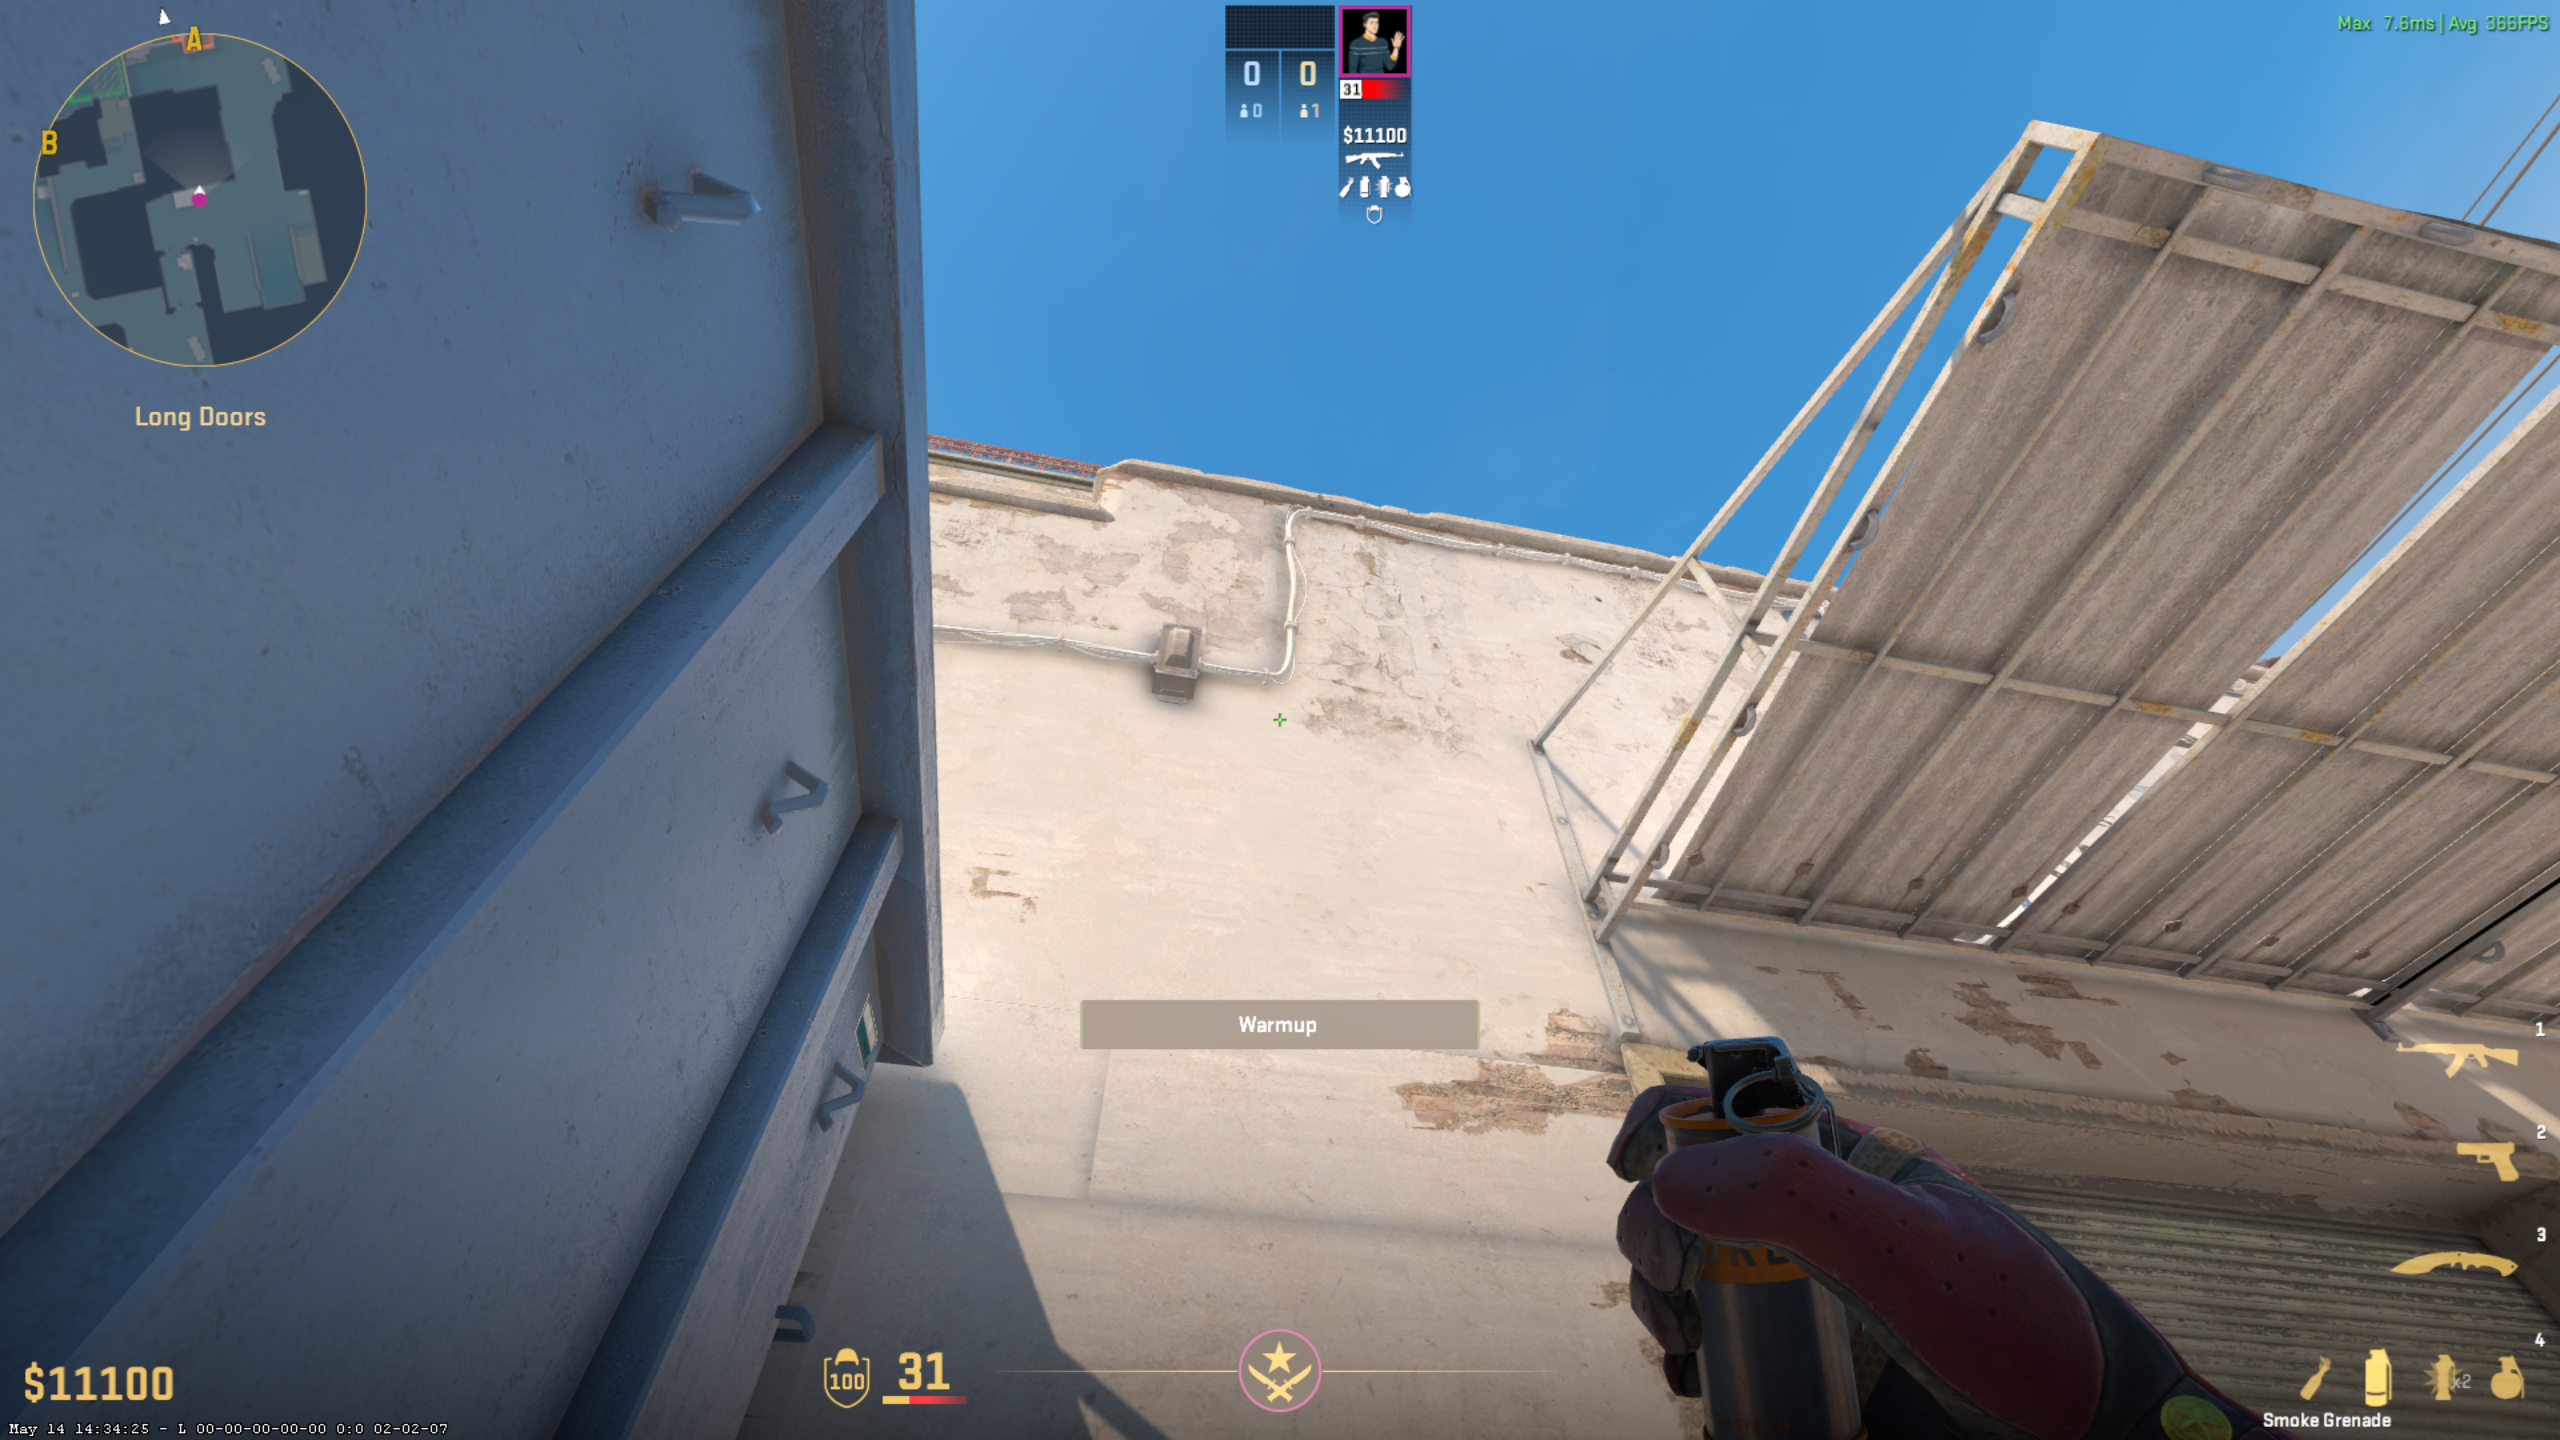
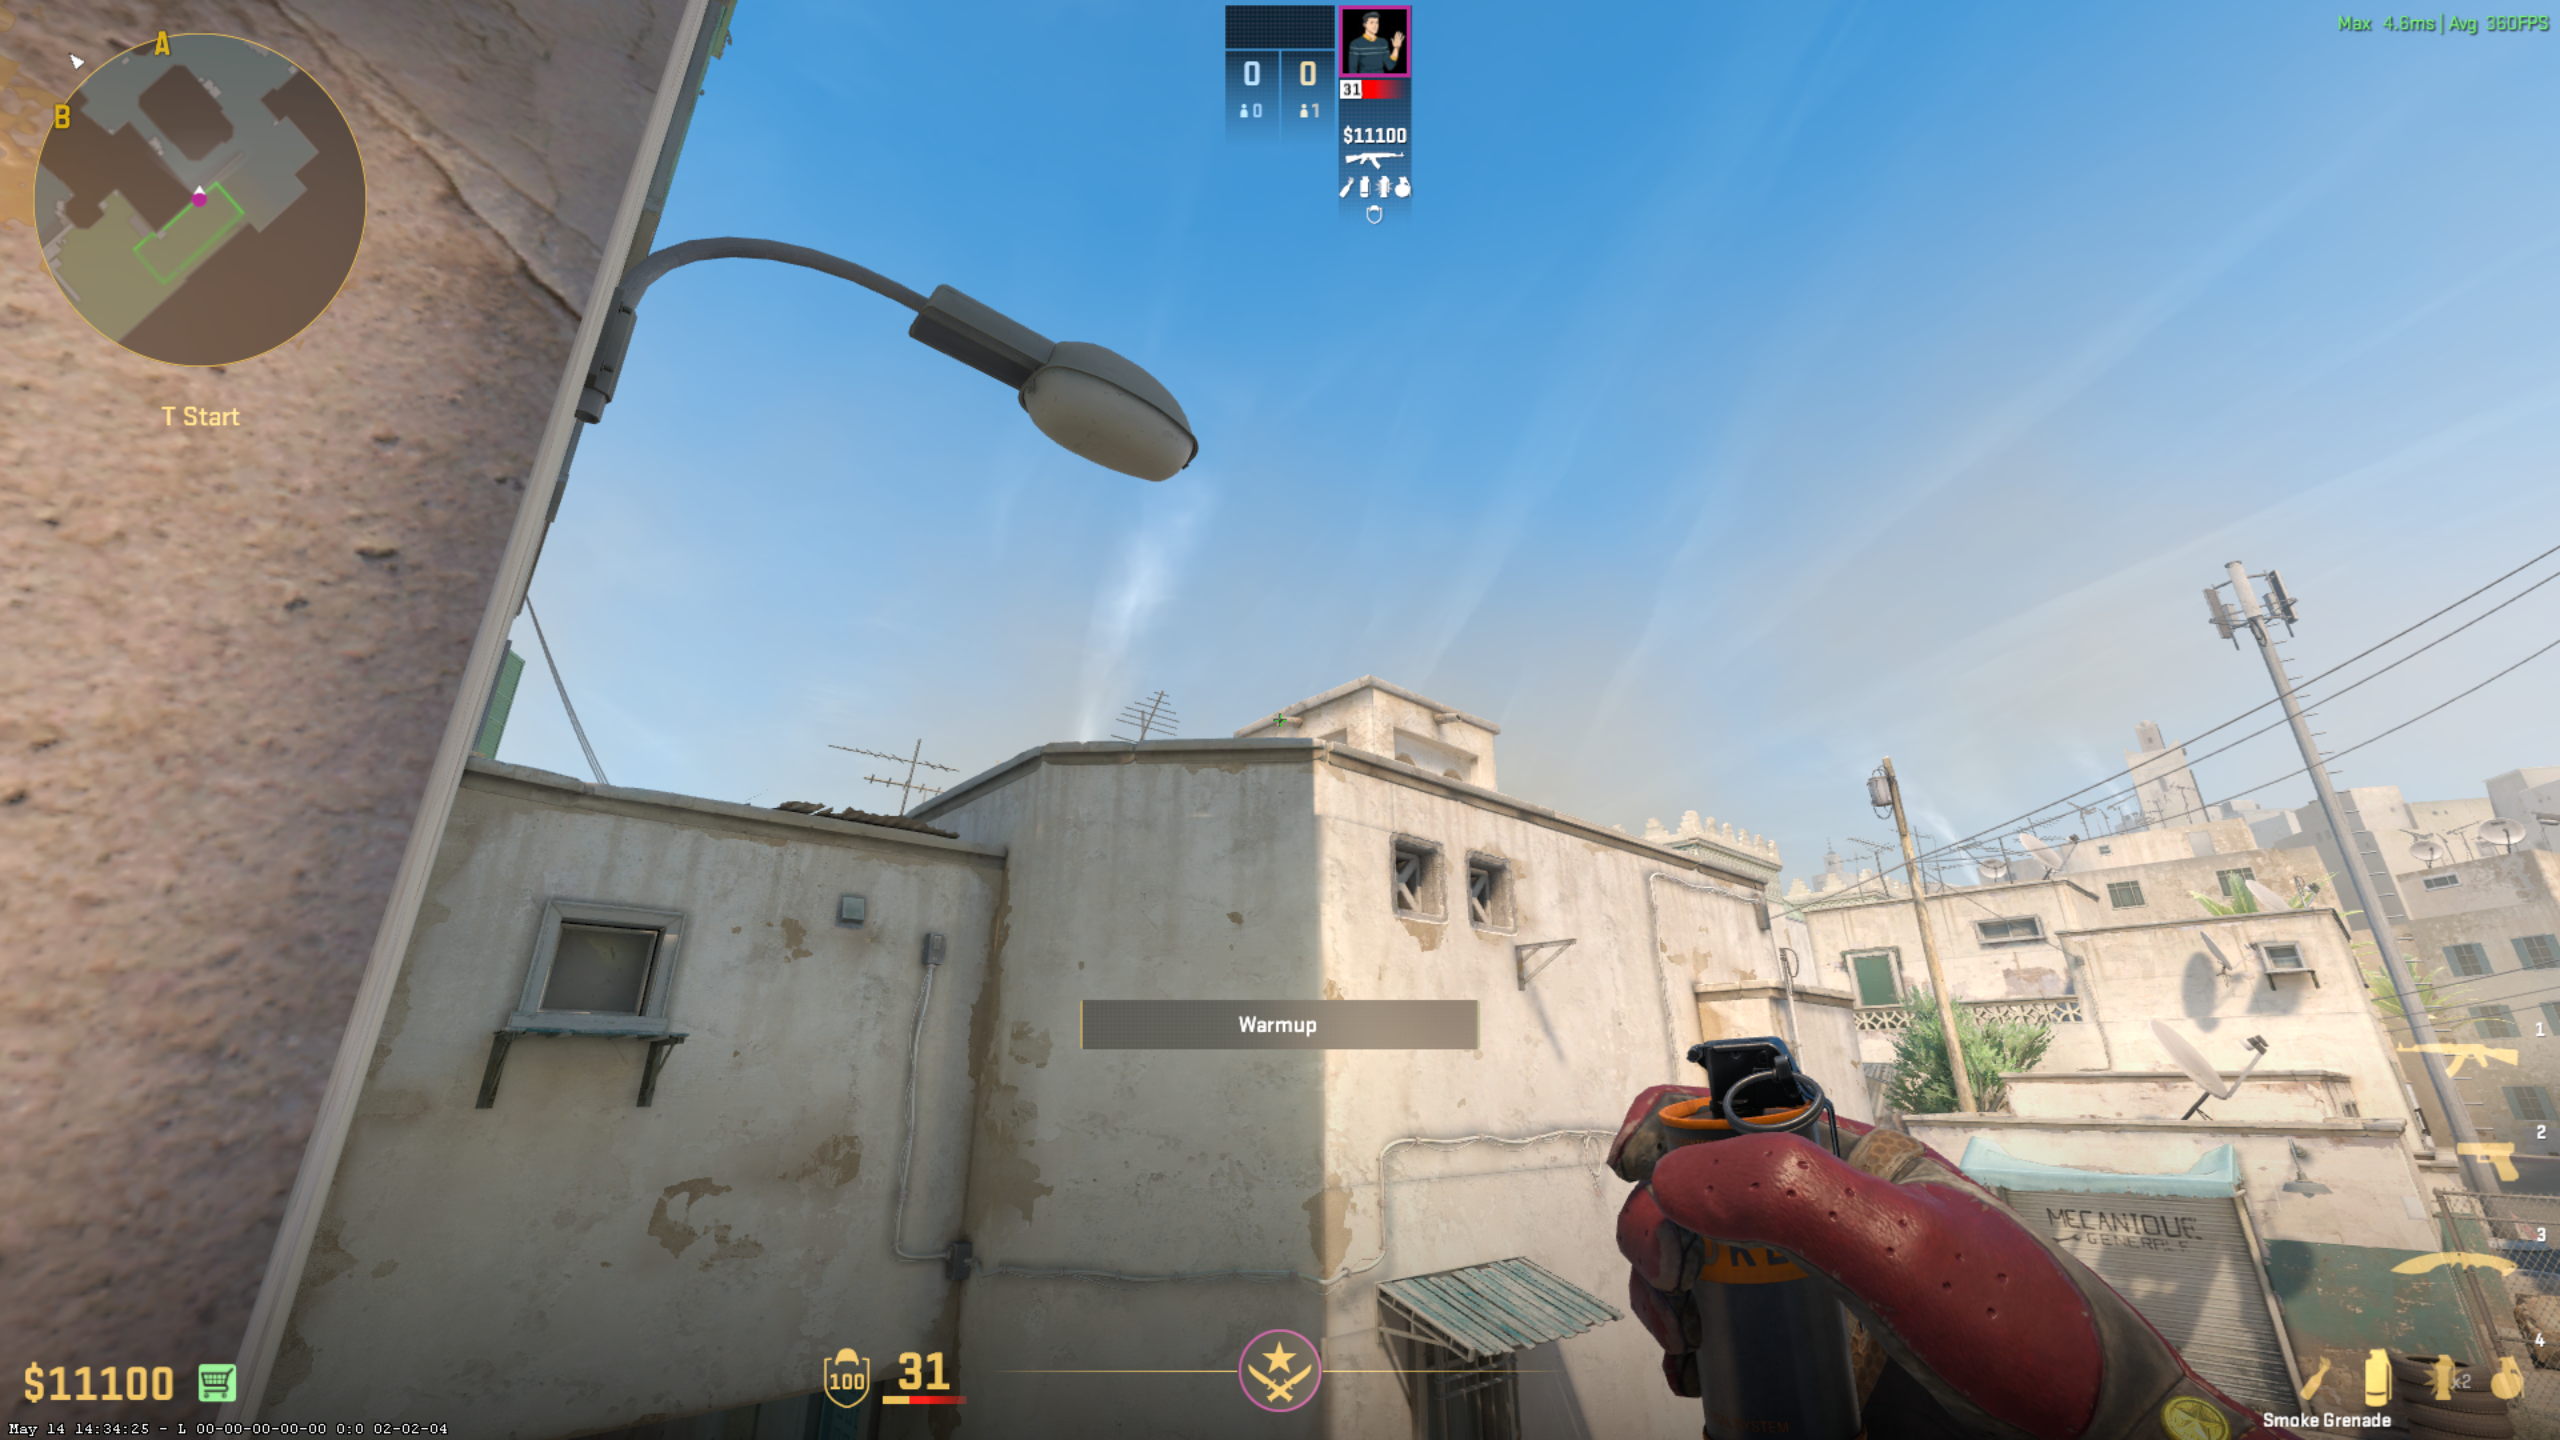
Aim
At the mark on the upper wall of the ornate building — click 🔍 to zoom in
Throw
Jump throw — hold LMB, jump, release on the way up
Lands
Smokes off B Door, cutting the CT rotation angle from mid
2
Smoke
B Lurk
Jump Throw
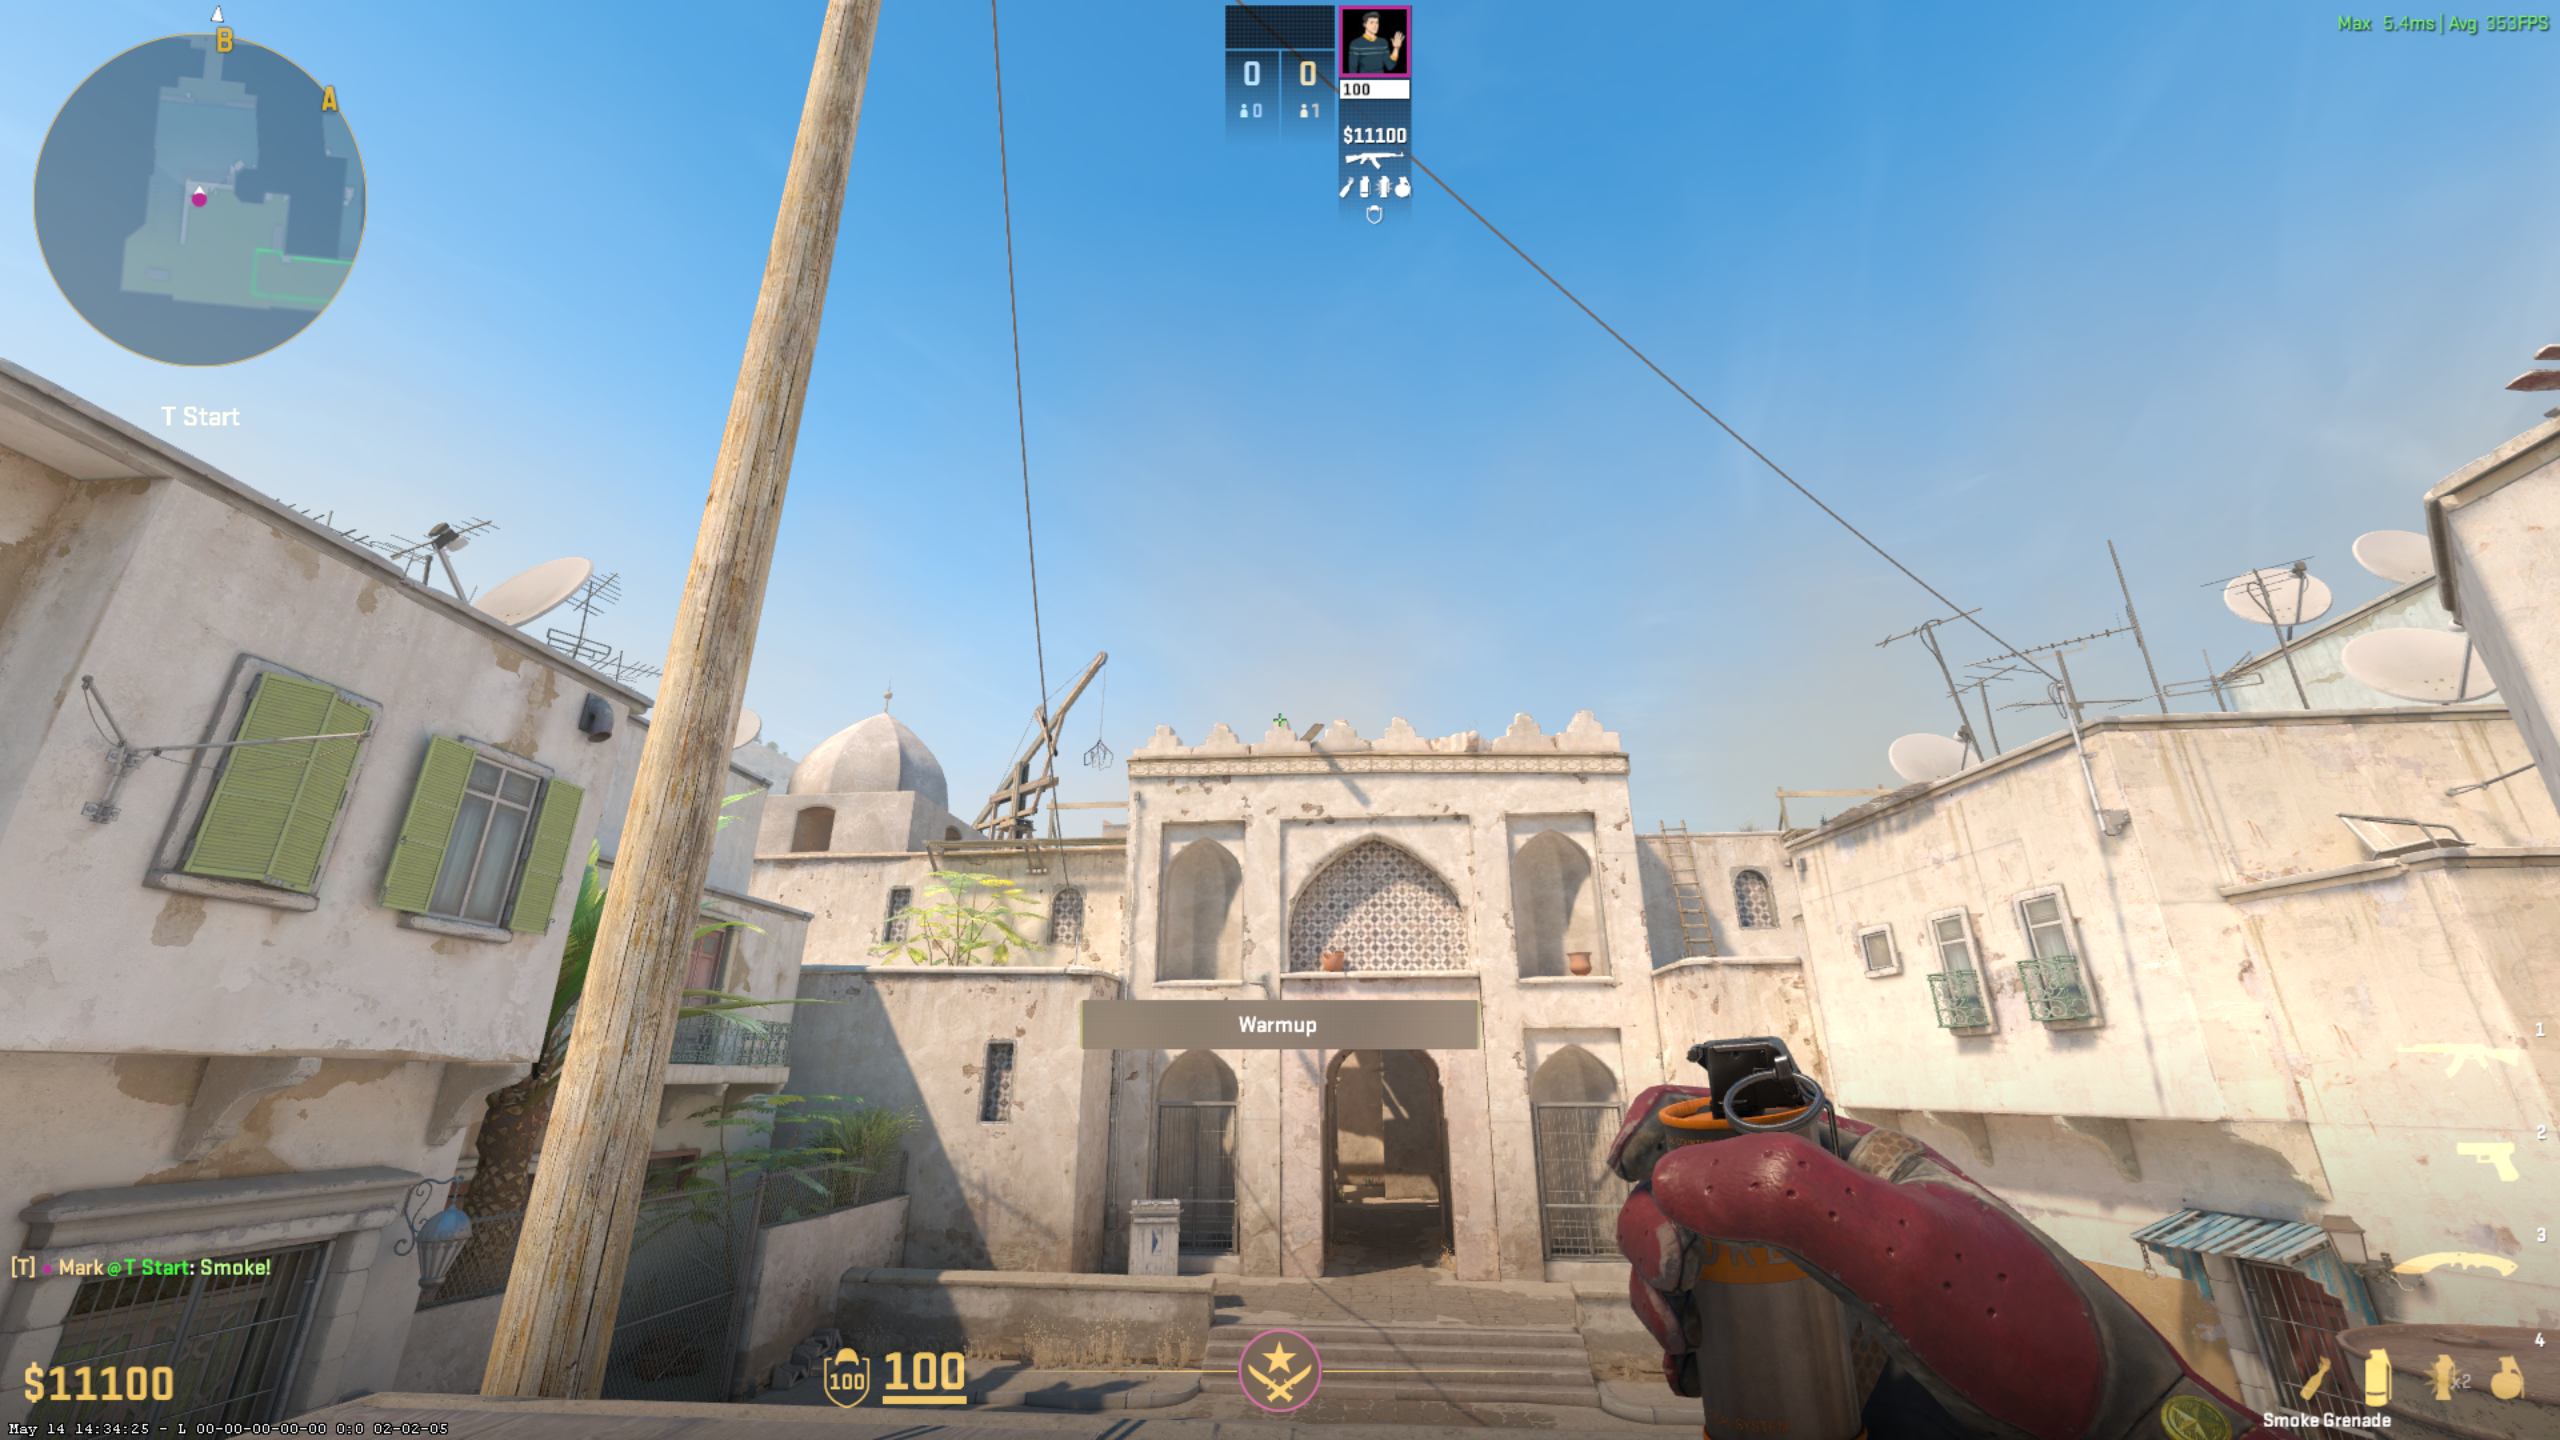
B Lurk Smoke
🖼️
Save as b-smoke2.png
🔍 Aim zoom
Stand
T Spawn boxes — same corner as smoke 1
Aim
Top-centre of the third battlement spike on the ornate building — click 🔍 to zoom in
Throw
Jump throw — hold LMB, jump, release on the way up
Lands
Blocks the back of B site, delaying any CT holding or pushing through
3
Flash
B Site
Jump Throw
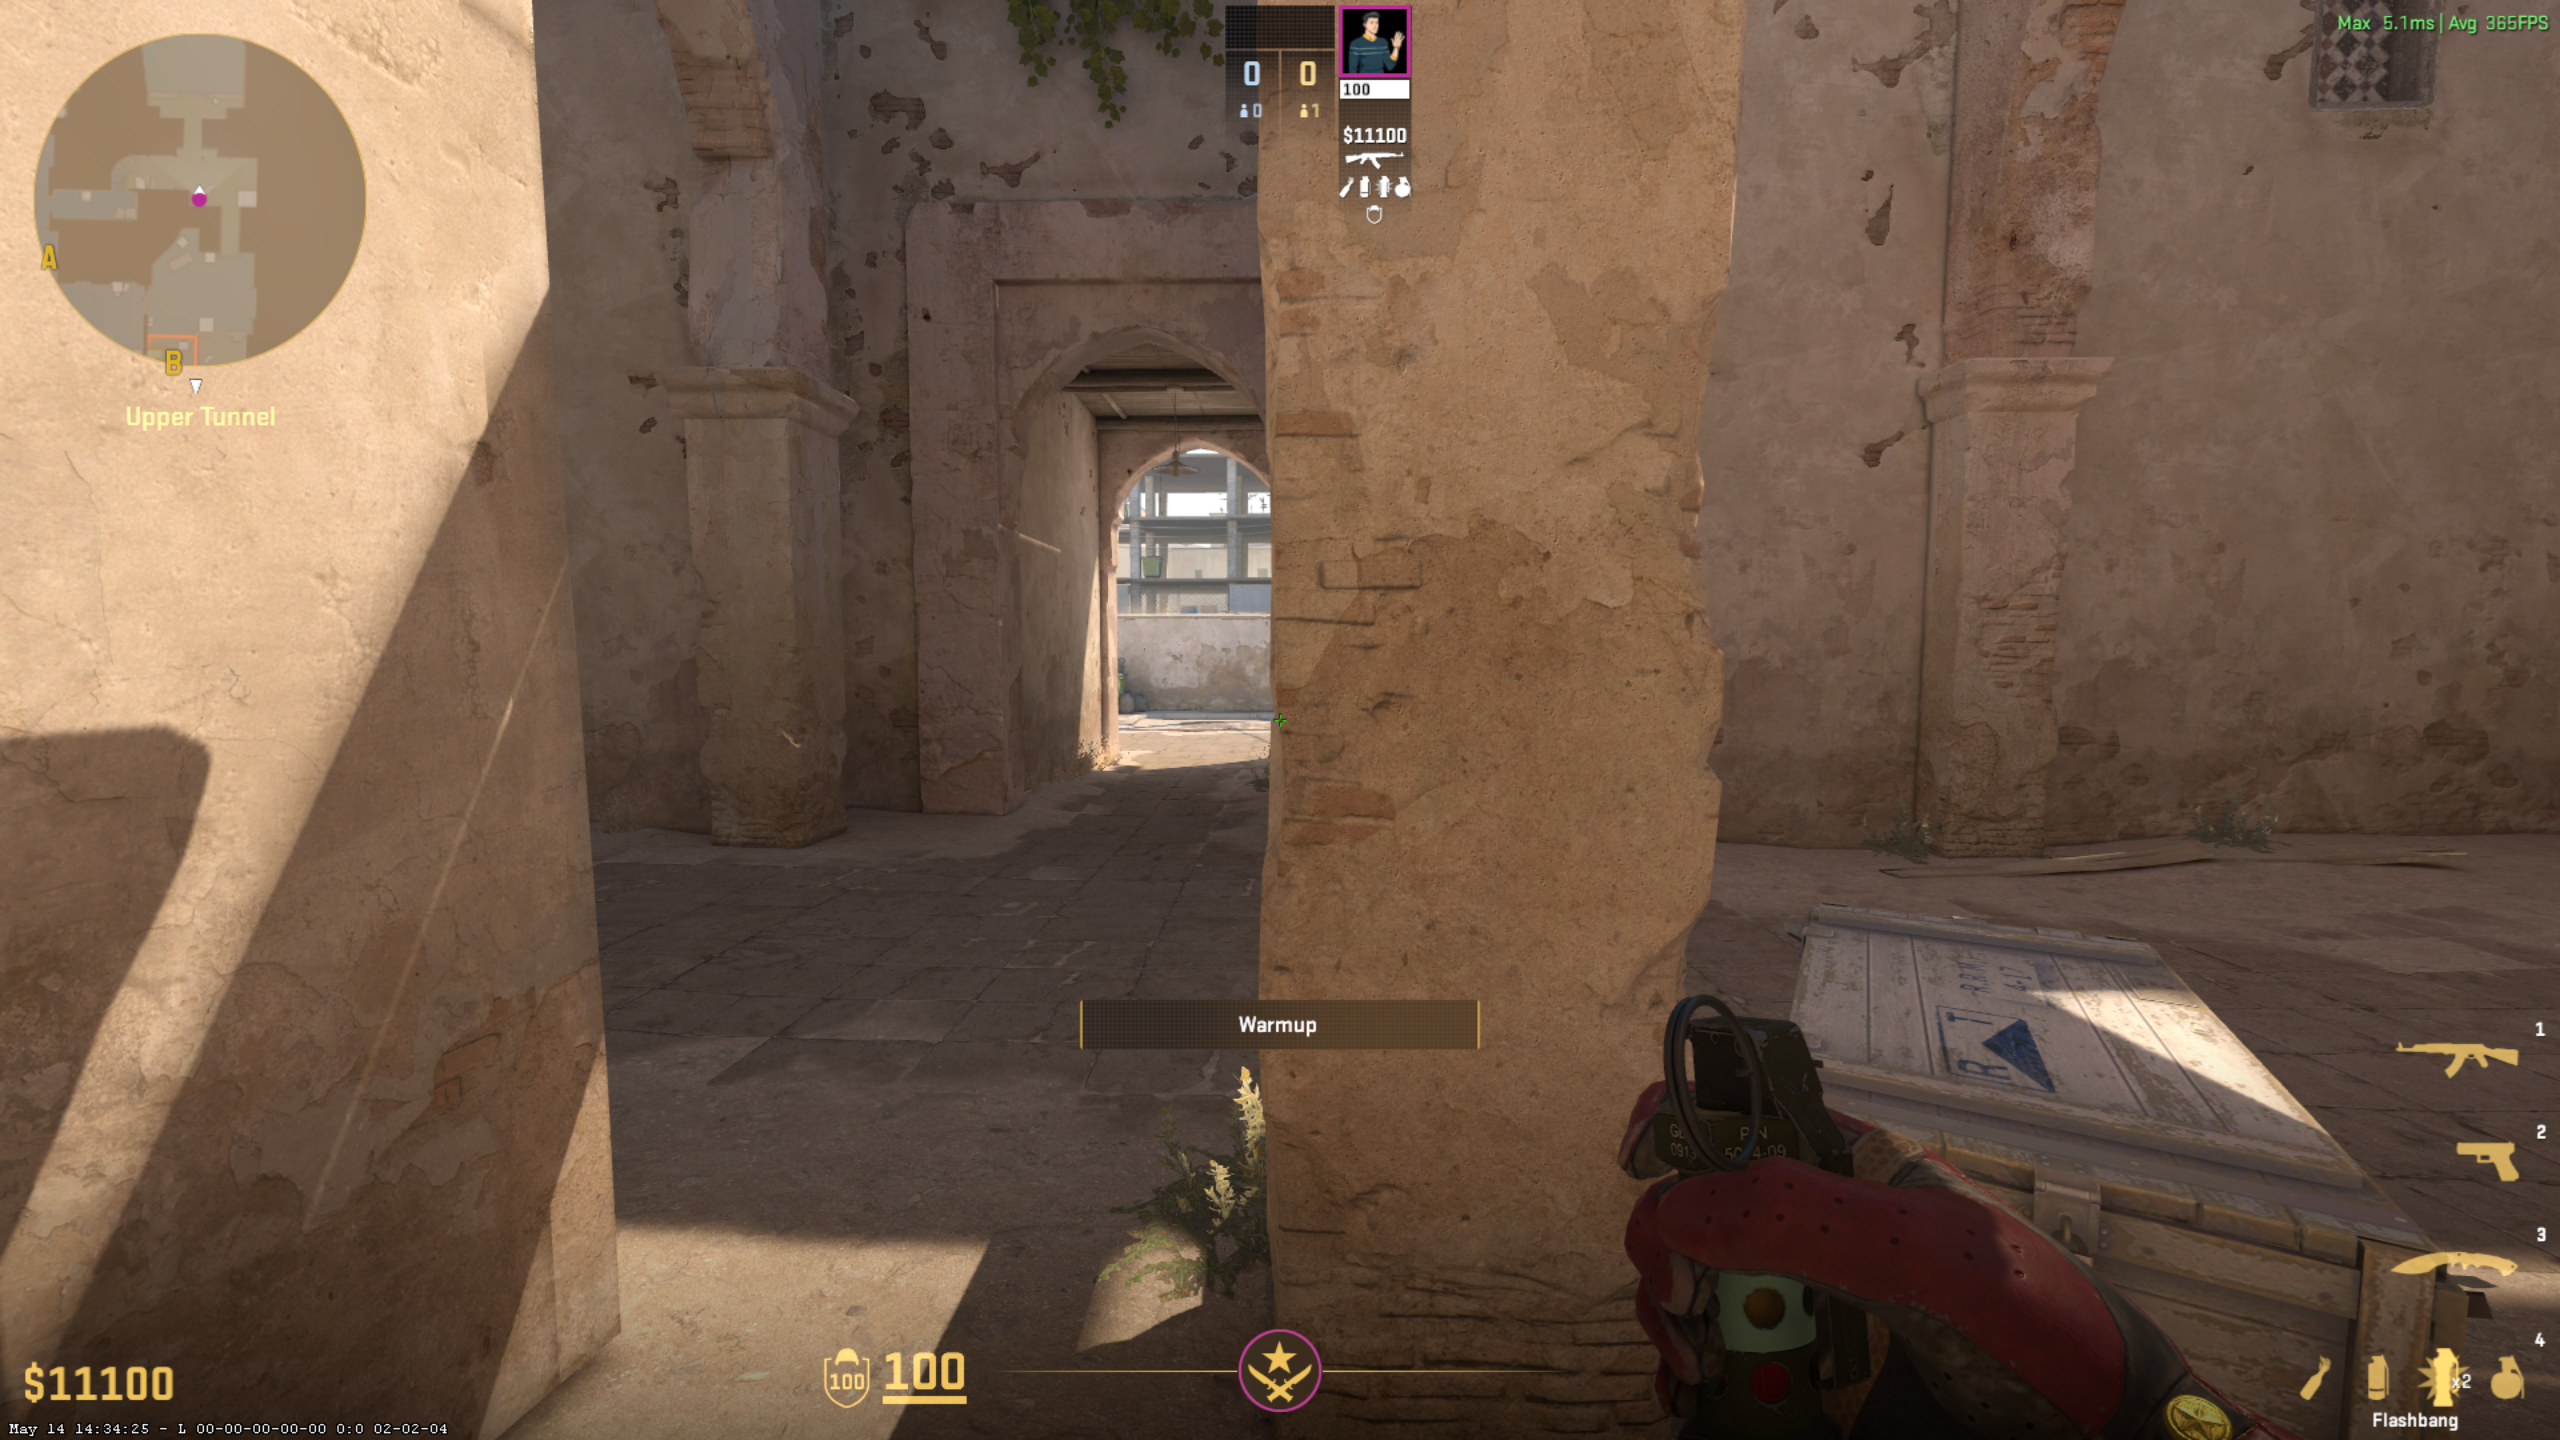
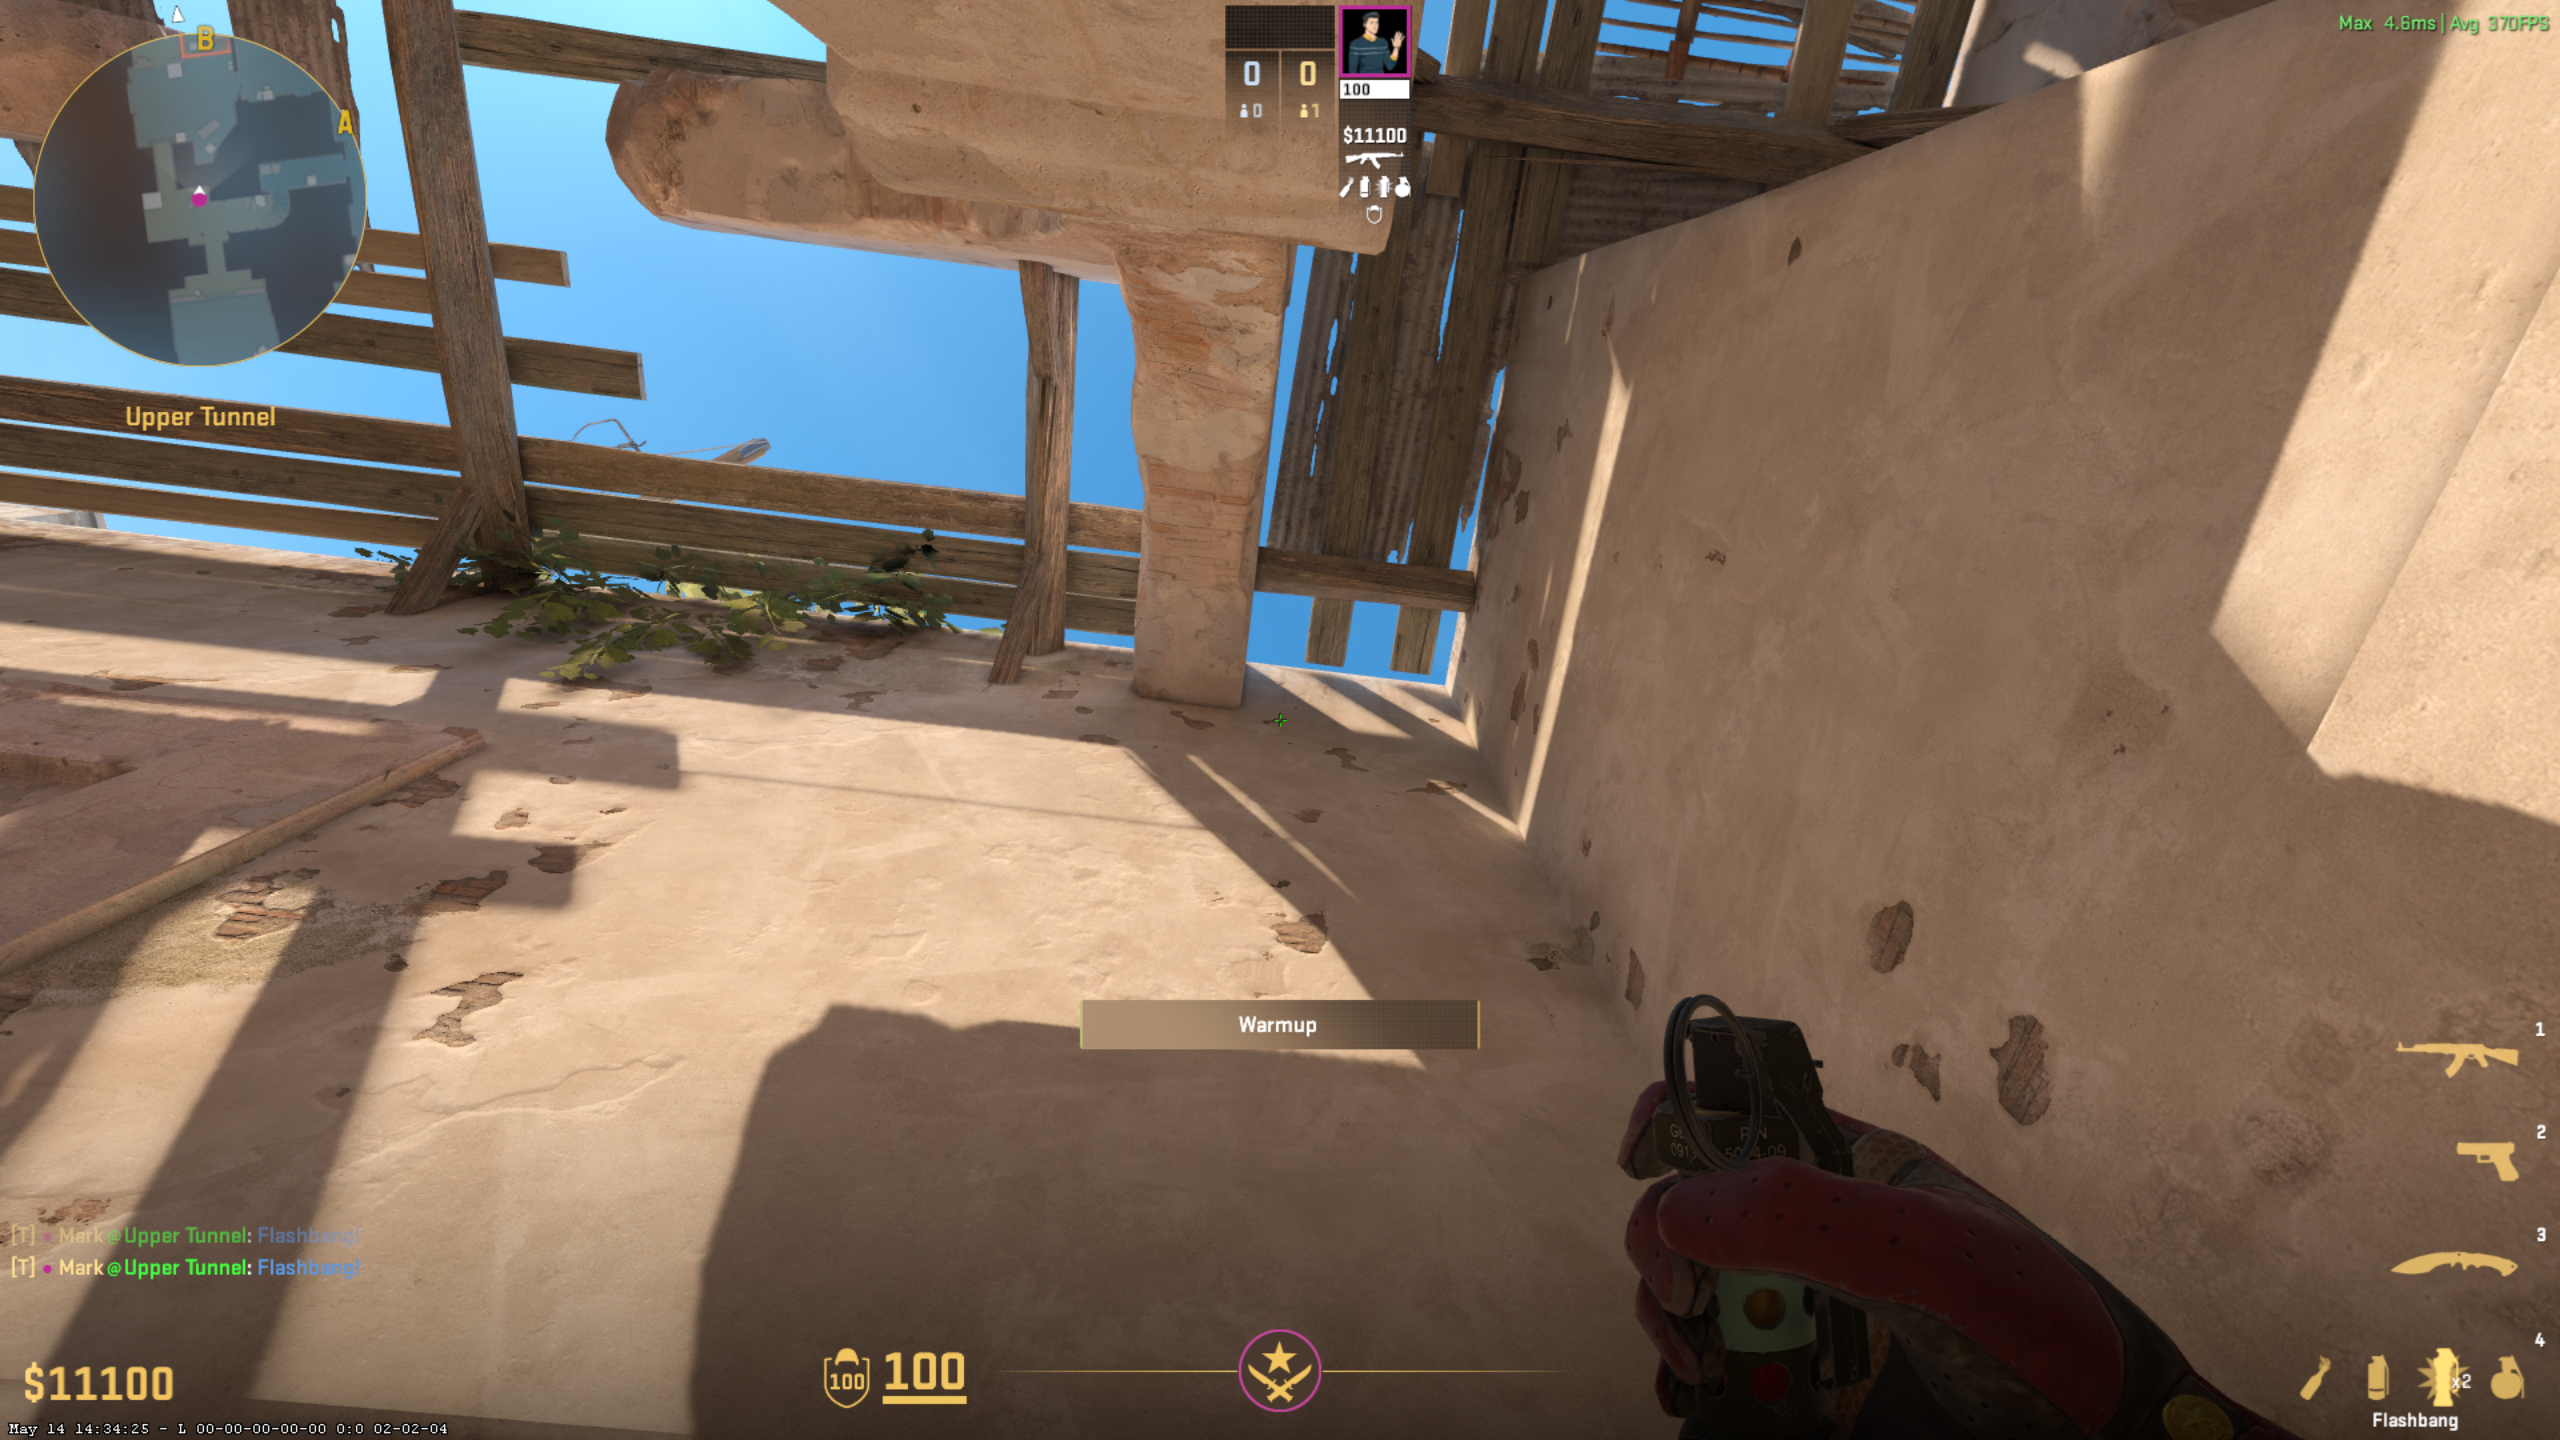
B Flash position
🖼️
Save as b-flash-pos.png & b-flash1.png
🔍 Aim zoom
Stand
Line up with the left side of the pillar in upper tunnels
Aim
Aim at the right side of the mark on the wall — click 🔍 to zoom in
Throw
Jump throw — hold LMB, jump, release on the way up
Effect
Flashes B site on execute
M

Mid

1 Smoke
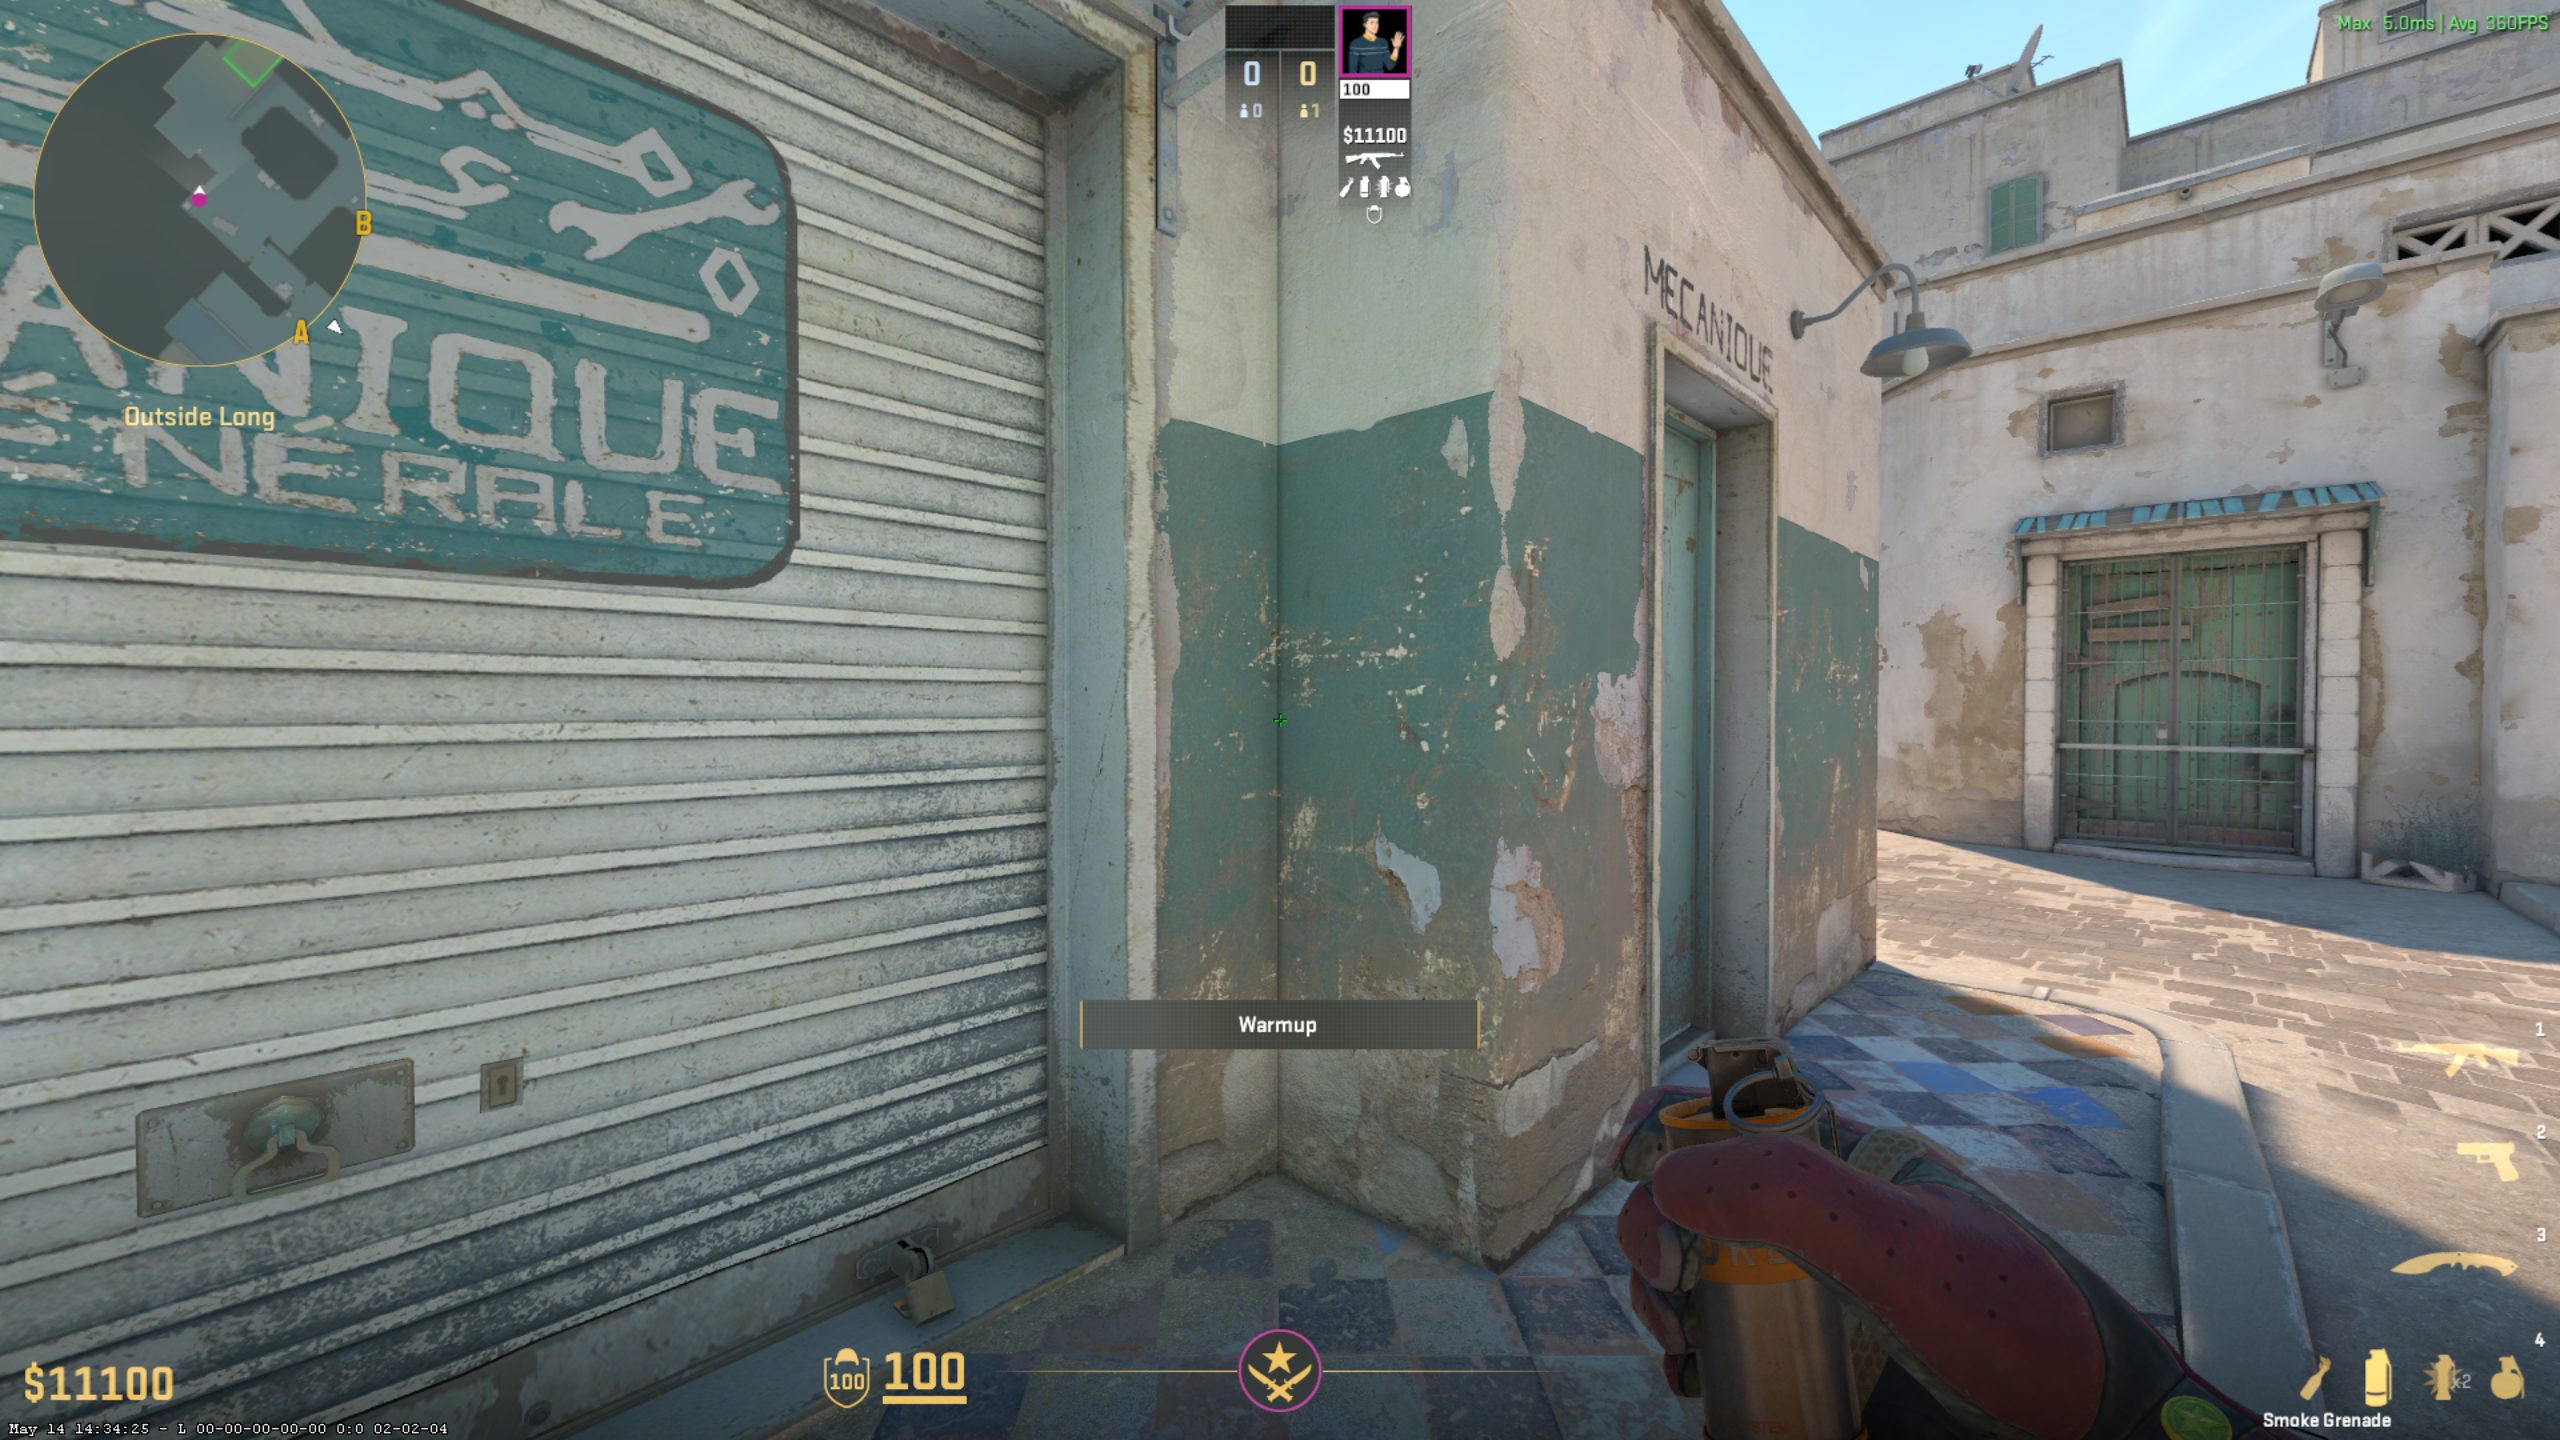
📍 Outside Long
📍 Smoke stand position — tuck into the corner between the garage shutter and the teal wall
Mid smoke position
🖼️
Save as mid-pos.png
1
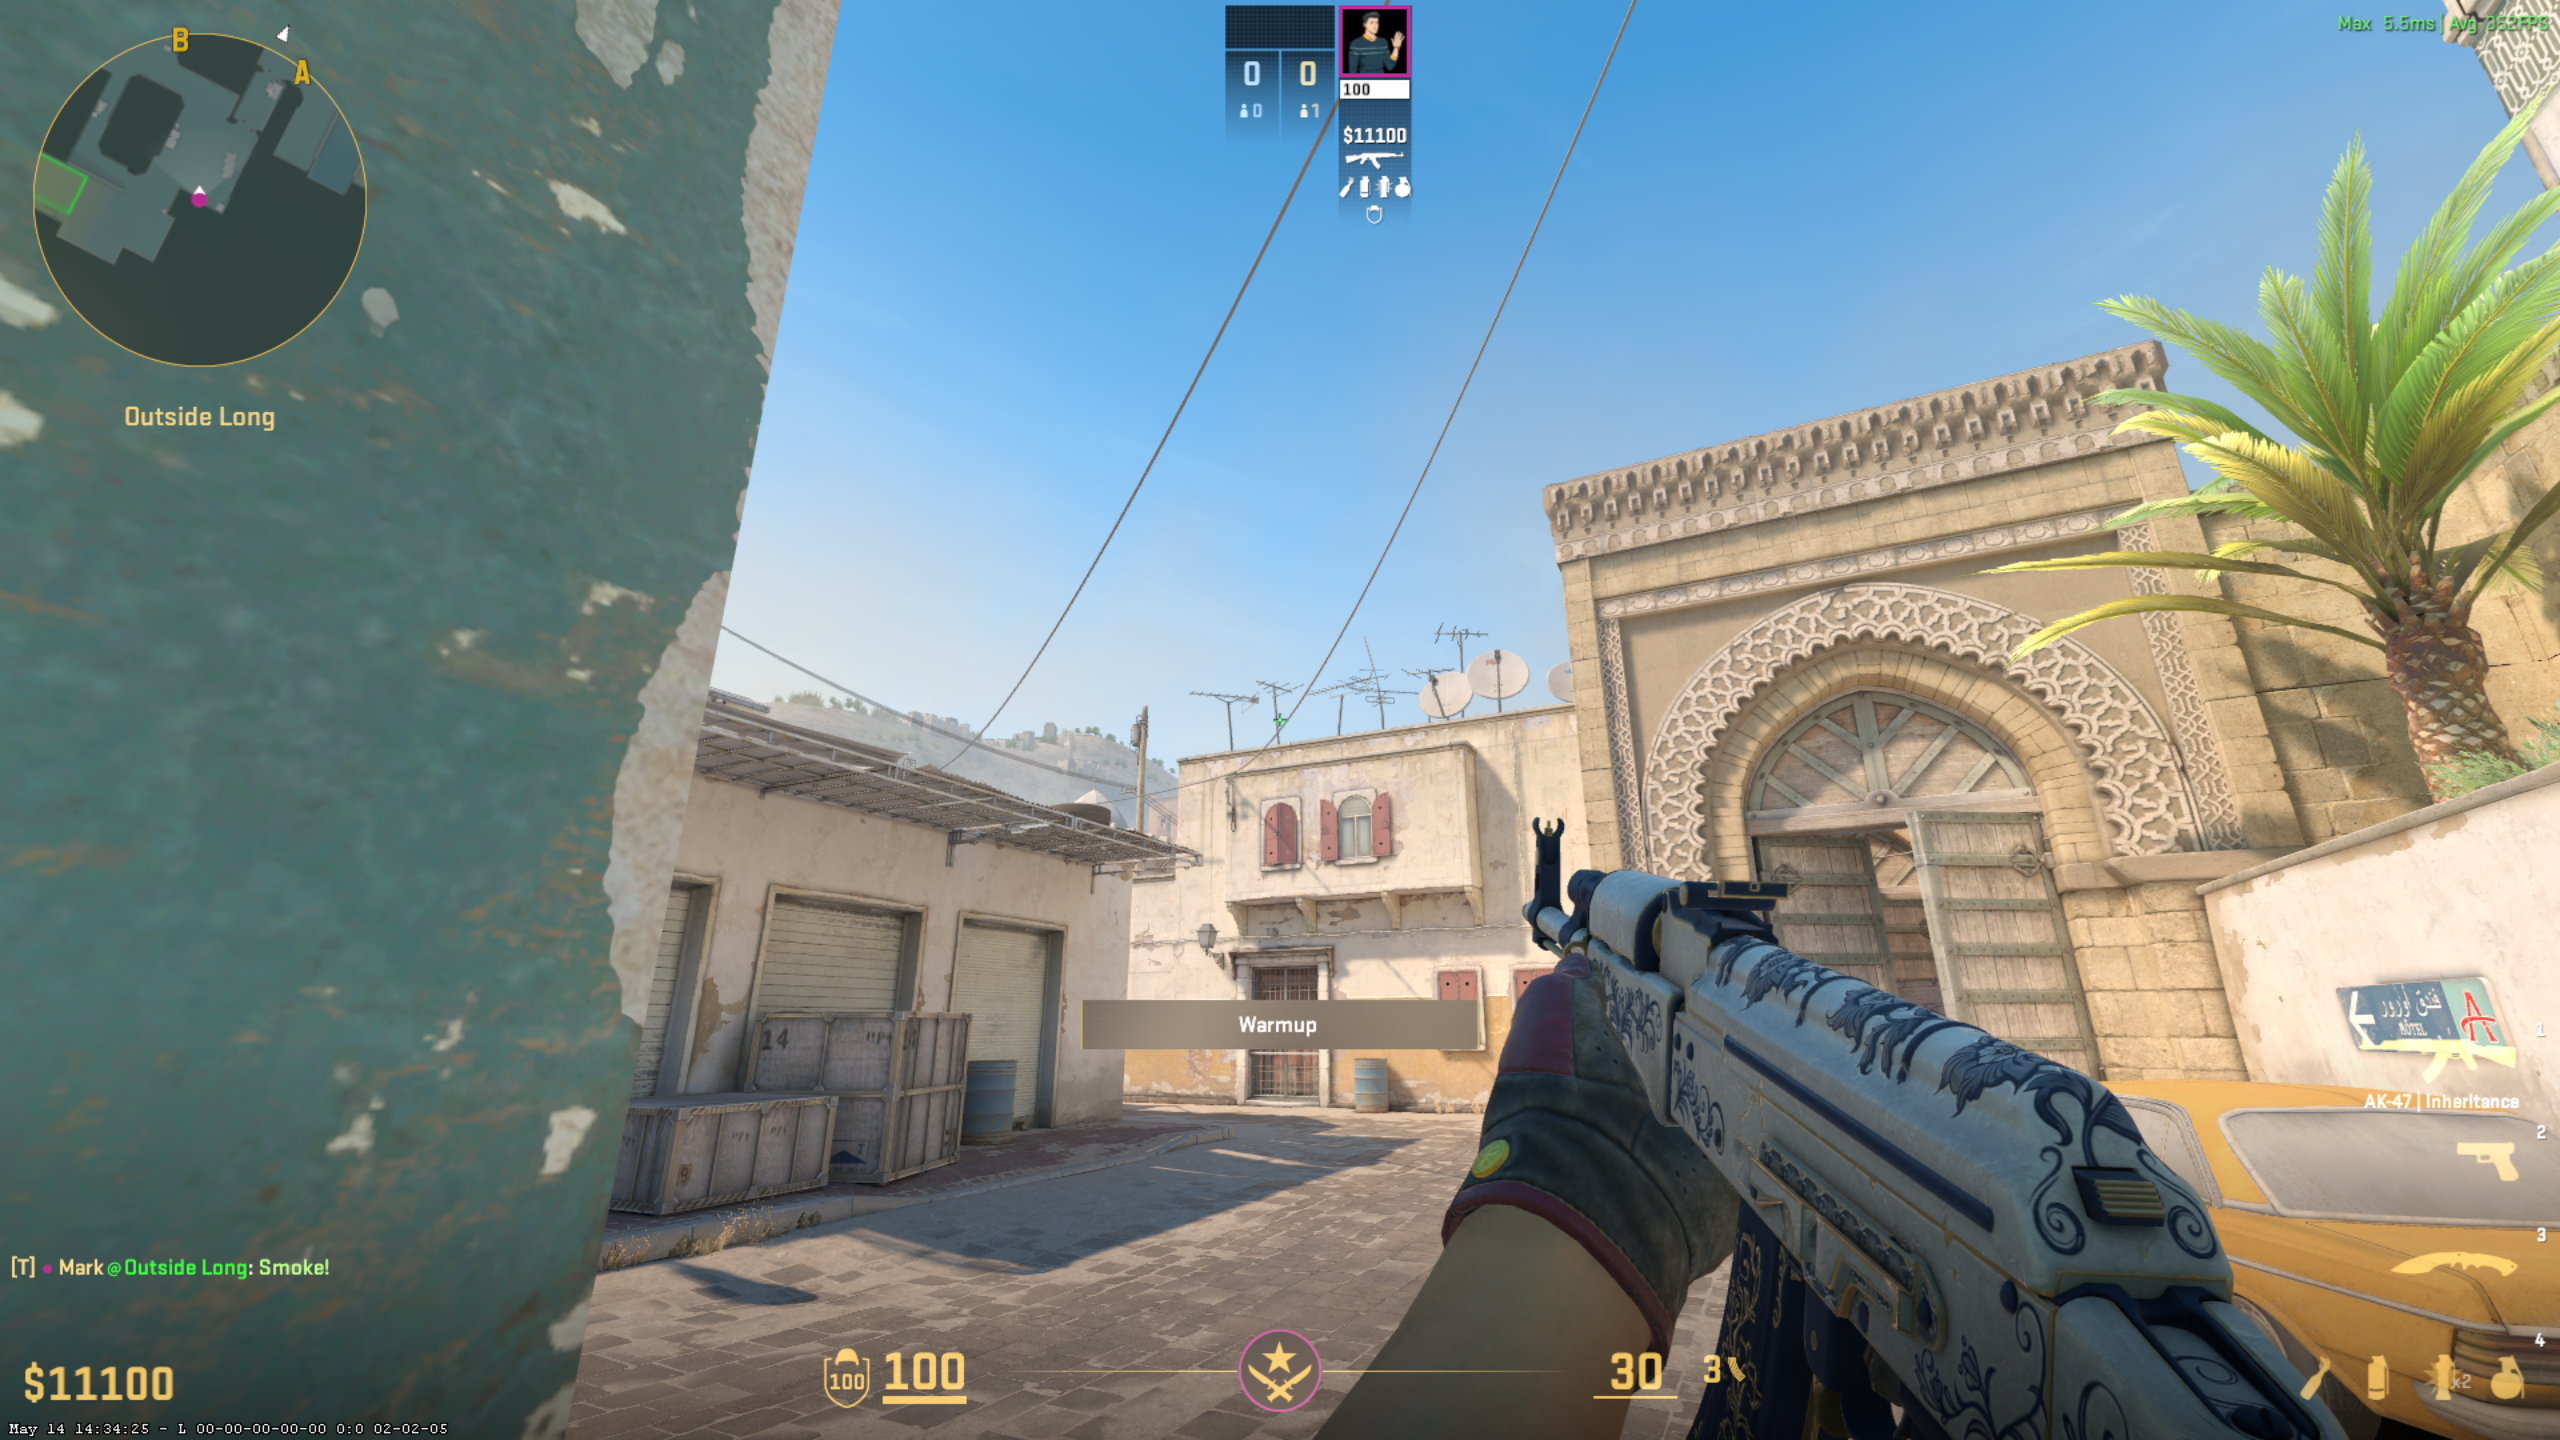
Smoke
Mid Doors
Jump Throw
Mid Doors Smoke
🖼️
Save as mid-smoke1.png
🔍 Aim zoom
Stand
Outside Long — tuck into the corner between the garage shutter and the teal wall
Aim
Just to the right of the aerial above the wire — click 🔍 to zoom in
Throw
Jump throw — hold LMB, jump, release on the way up
Lands
Lands on top of mid doors and cascades down, fully blocking the CT window angle

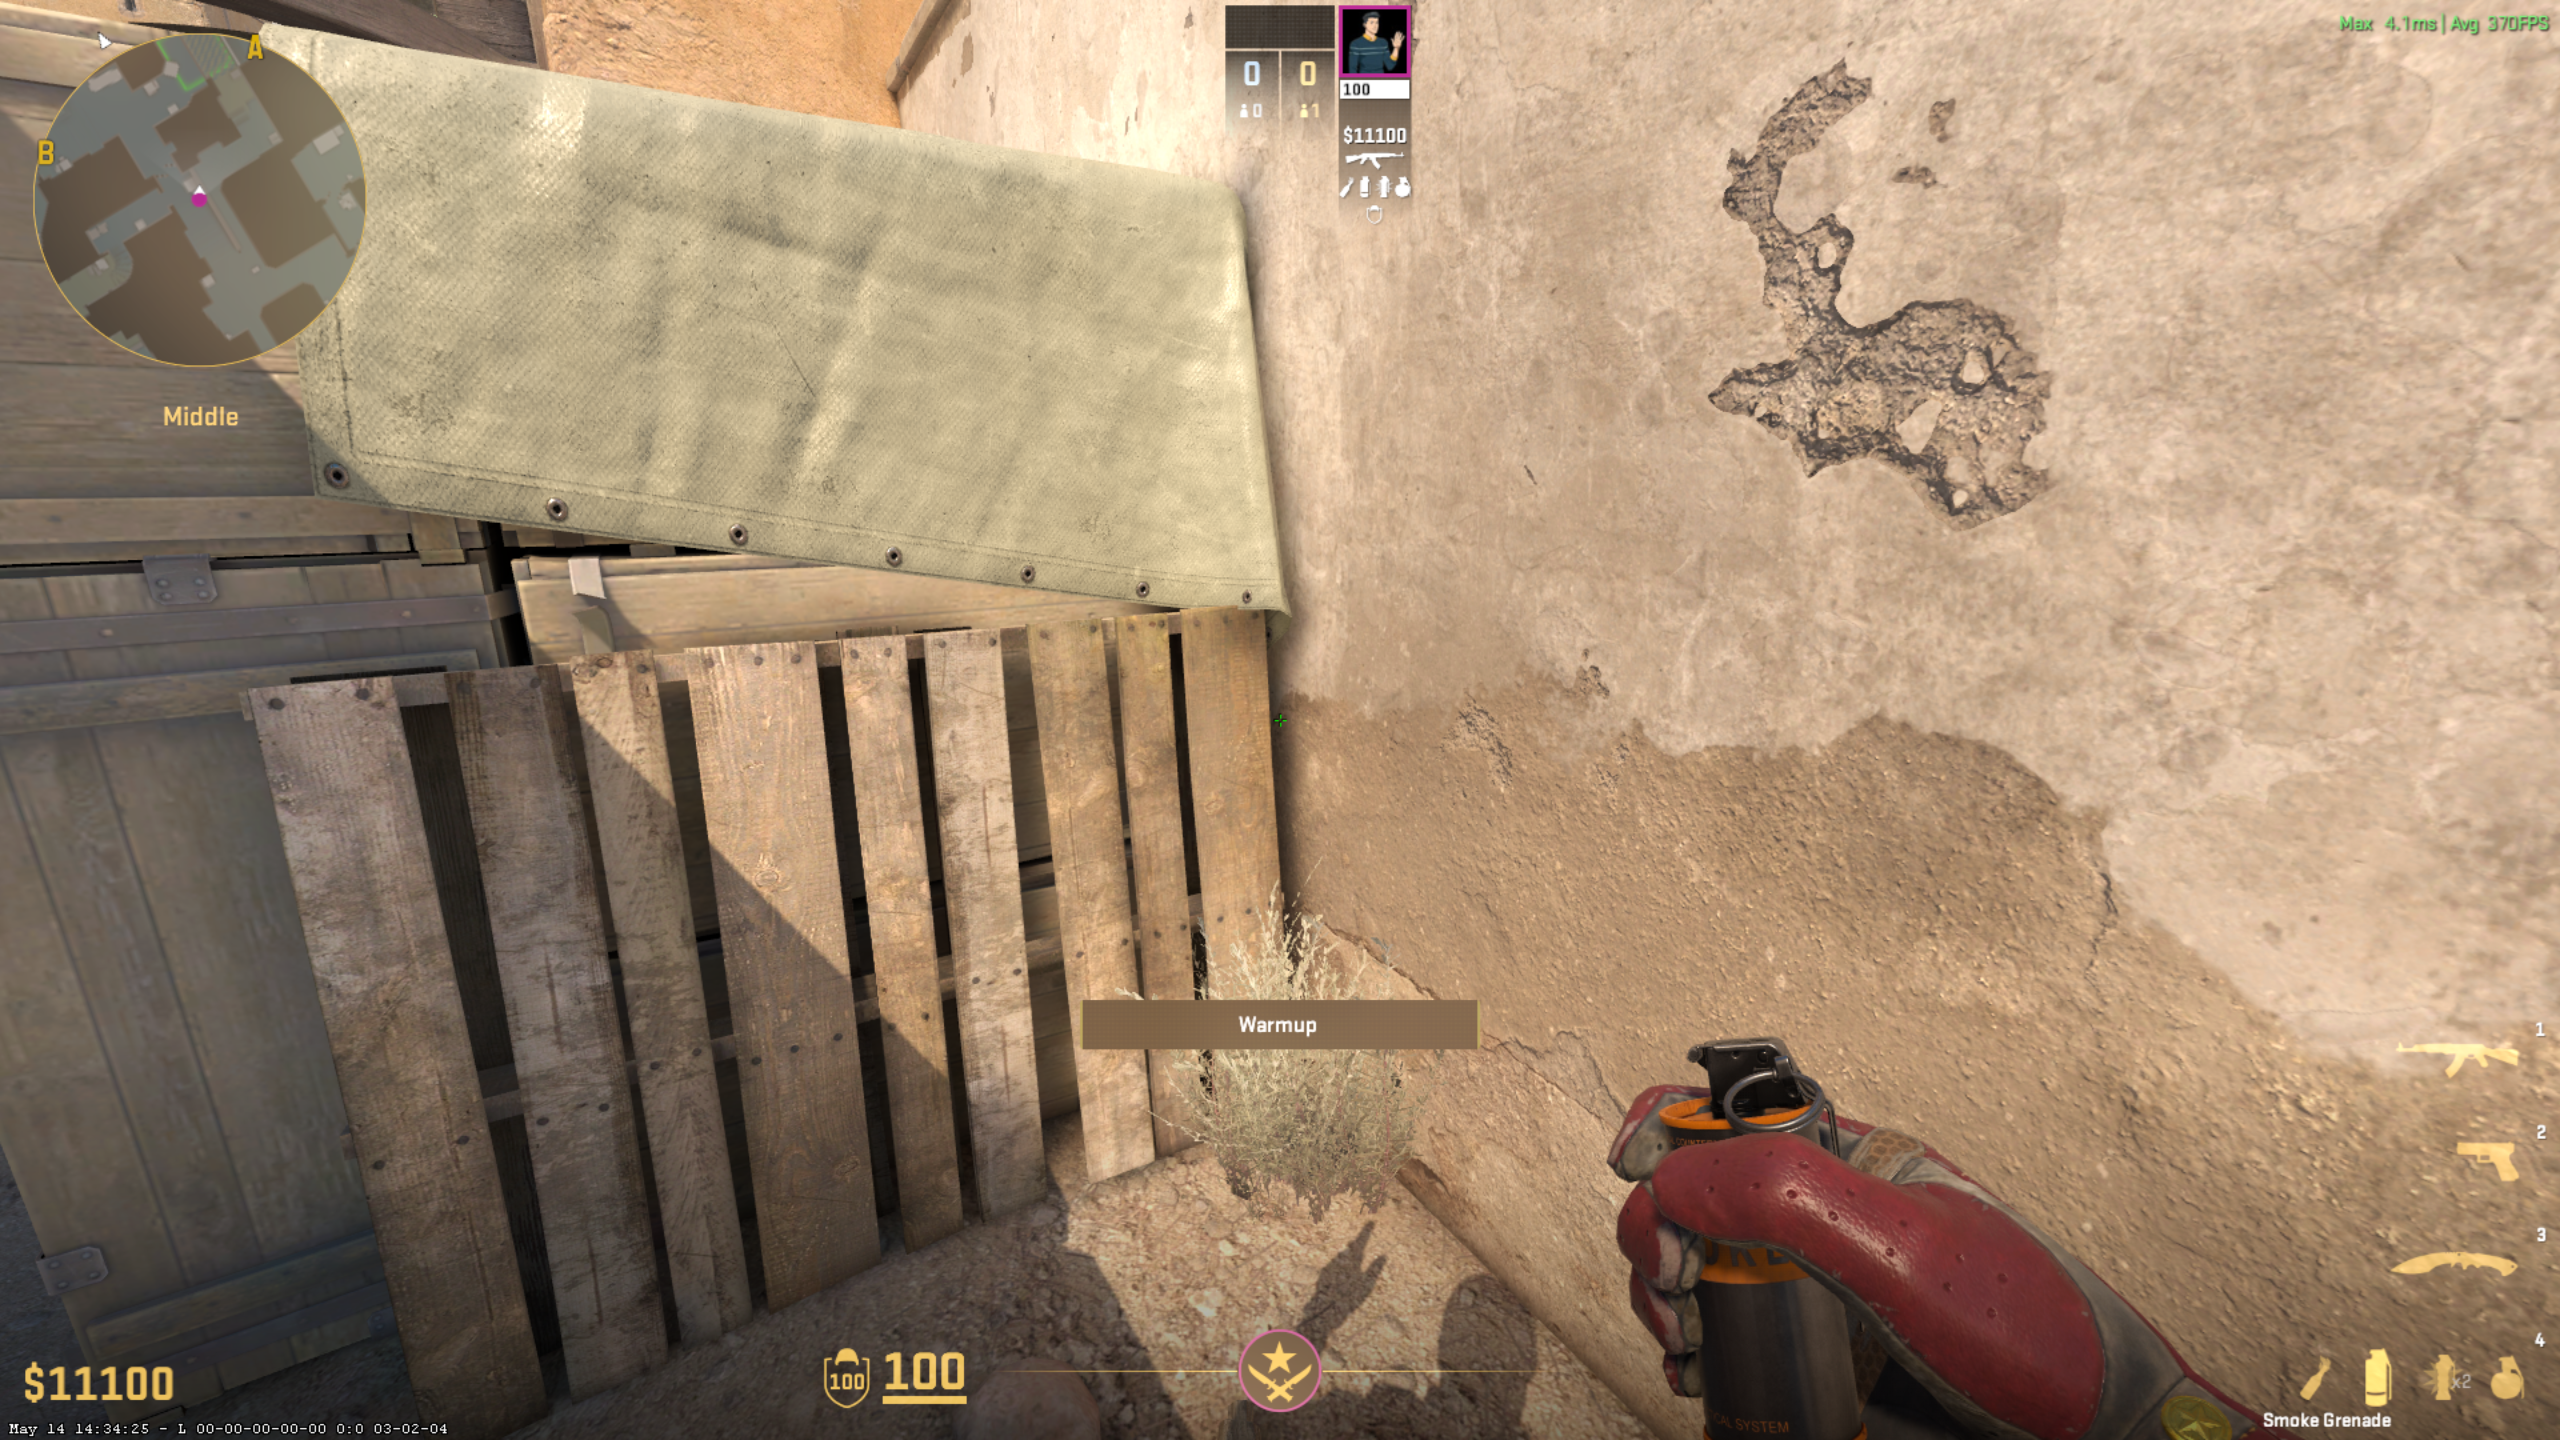
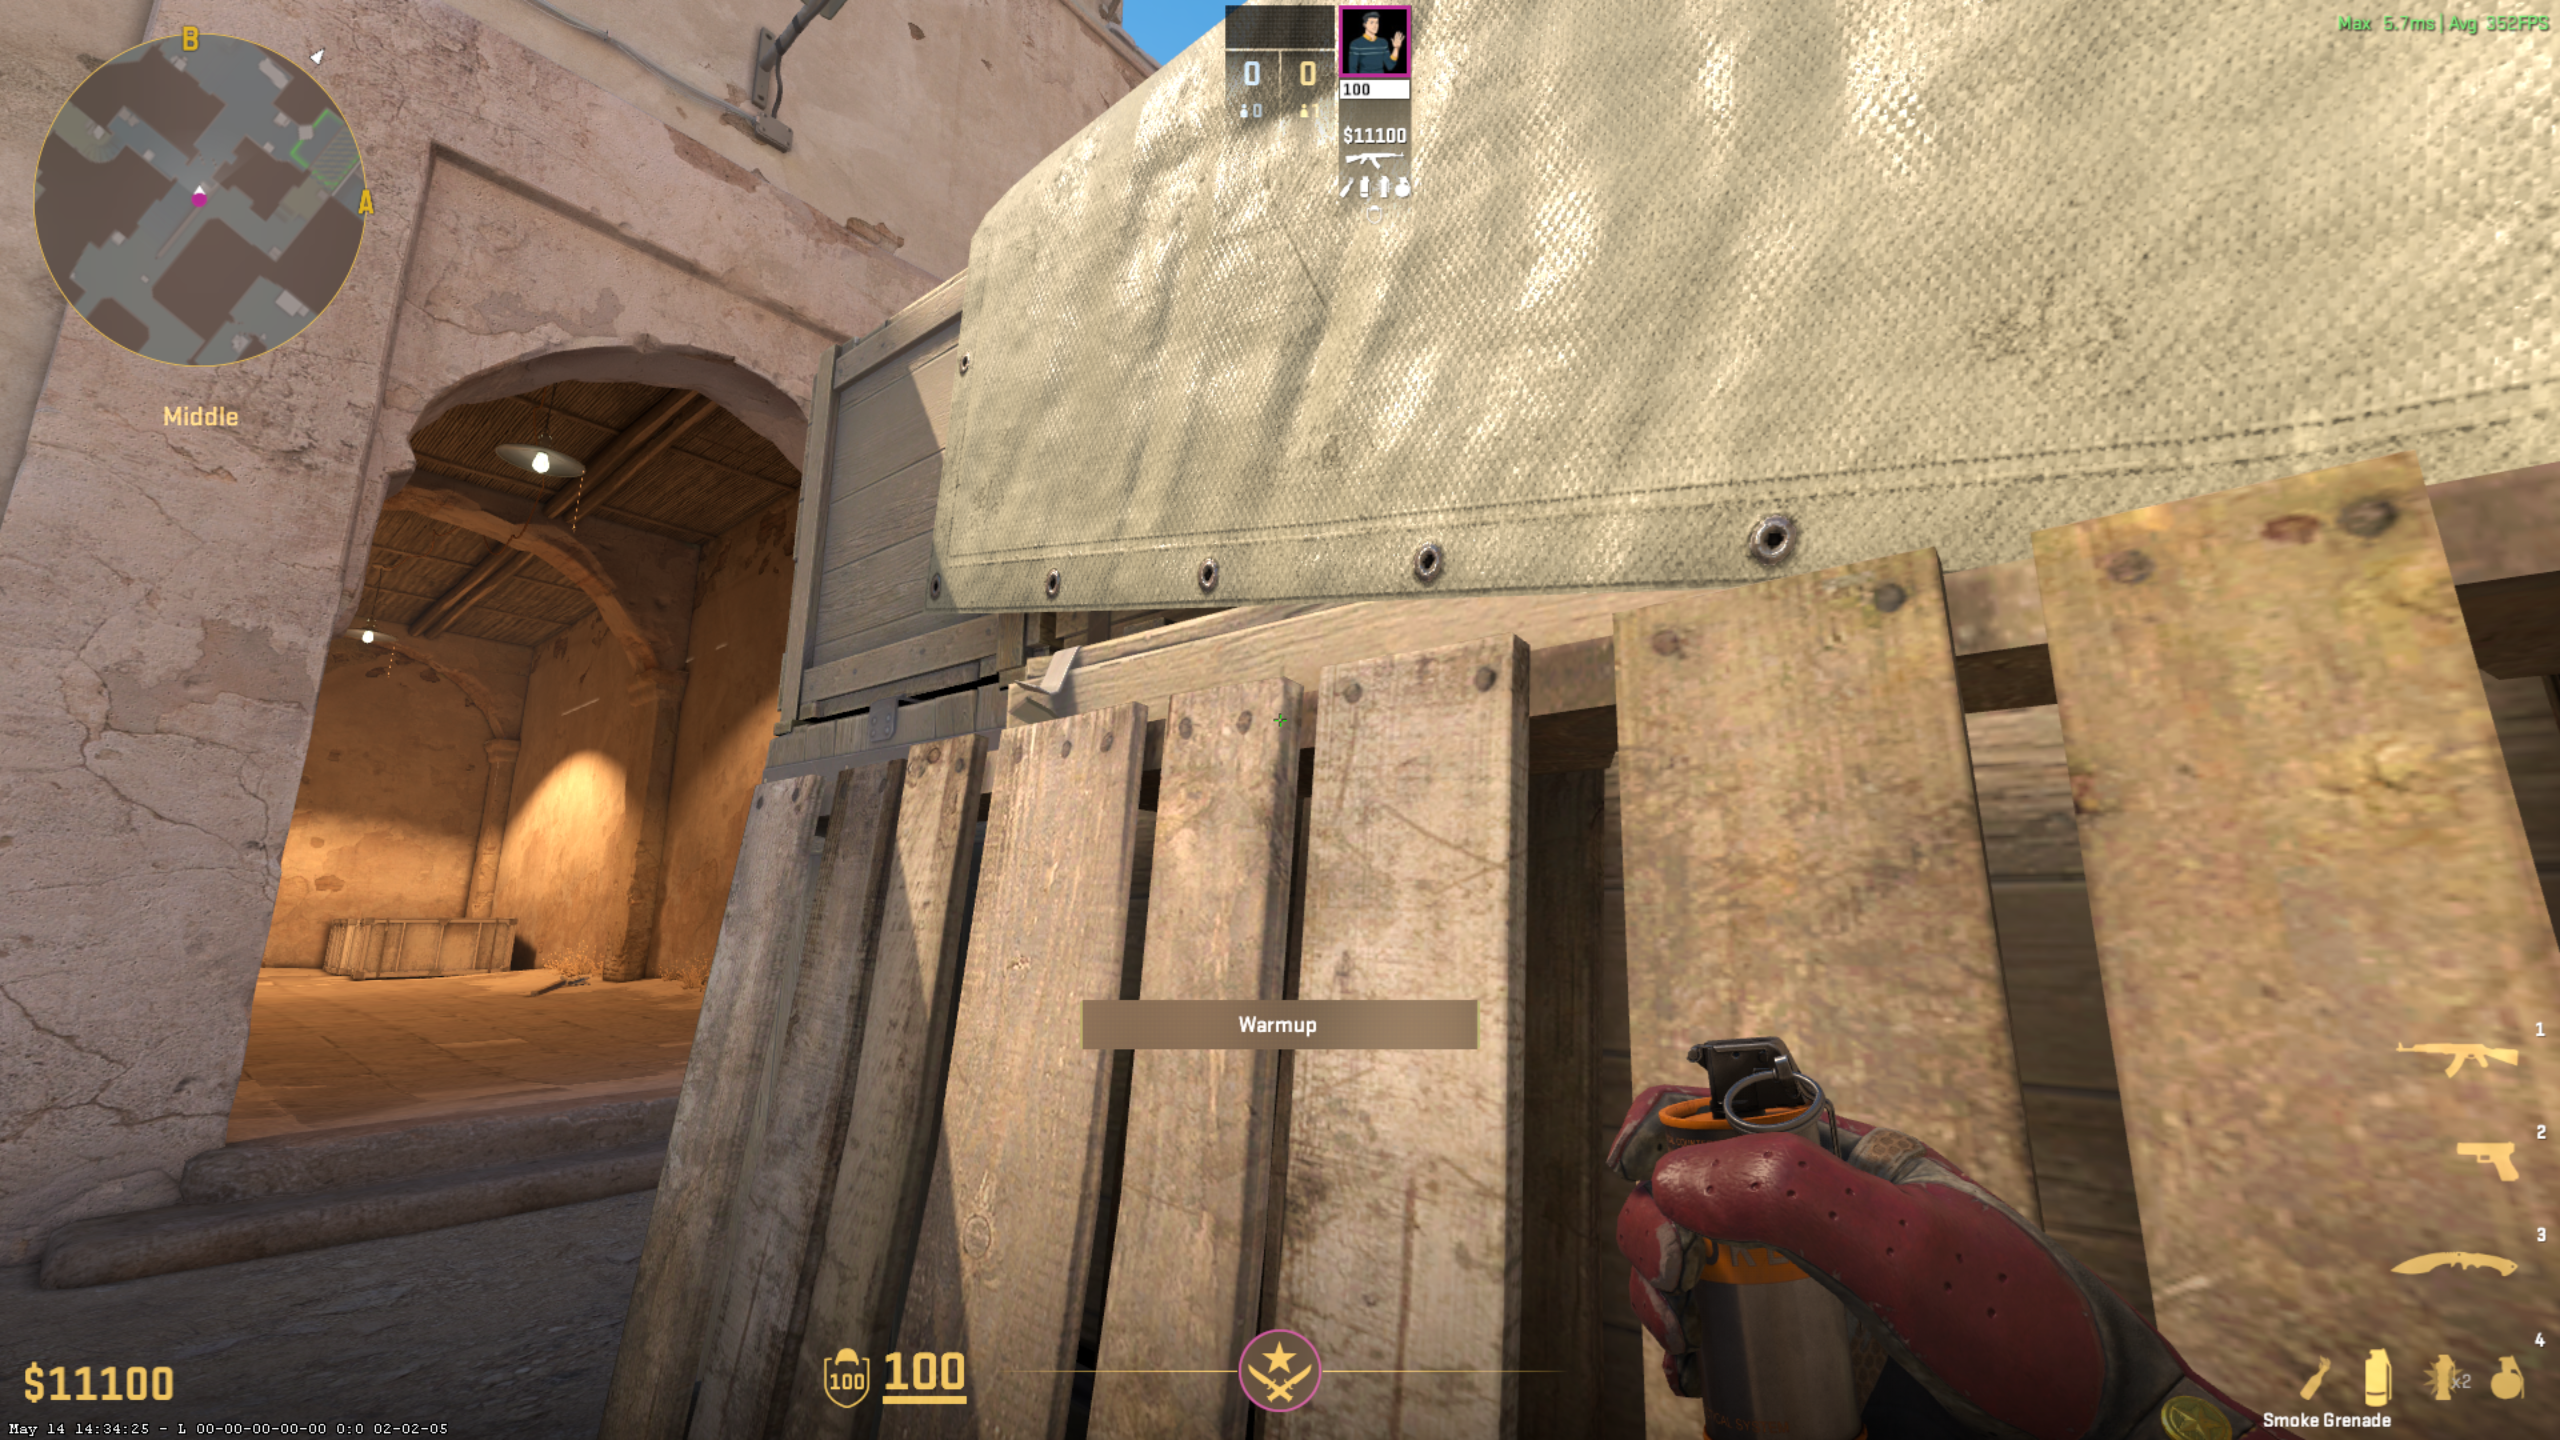
📍 Smoke & flash stand position — tuck into the corner of Xbox on mid
Xbox position
🖼️
Save as mid-xbox-pos.png
2
Smoke
Mid to B
↓↑ Crouch Jump Throw
Mid to B Smoke
🖼️
Save as mid-b-smoke.png
🔍 Aim zoom
Stand
Xbox on mid — tuck into the corner of the box
Aim
Crouch and aim at the edge of the thinner plank, in line with the right nail — click 🔍 to zoom in
Throw
Stay crouched — hold LMB, jump, release on the way up
Lands
Smokes mid to B, blocking the short cut from mid
3
Flash
Mid to B
🖱 Left Click
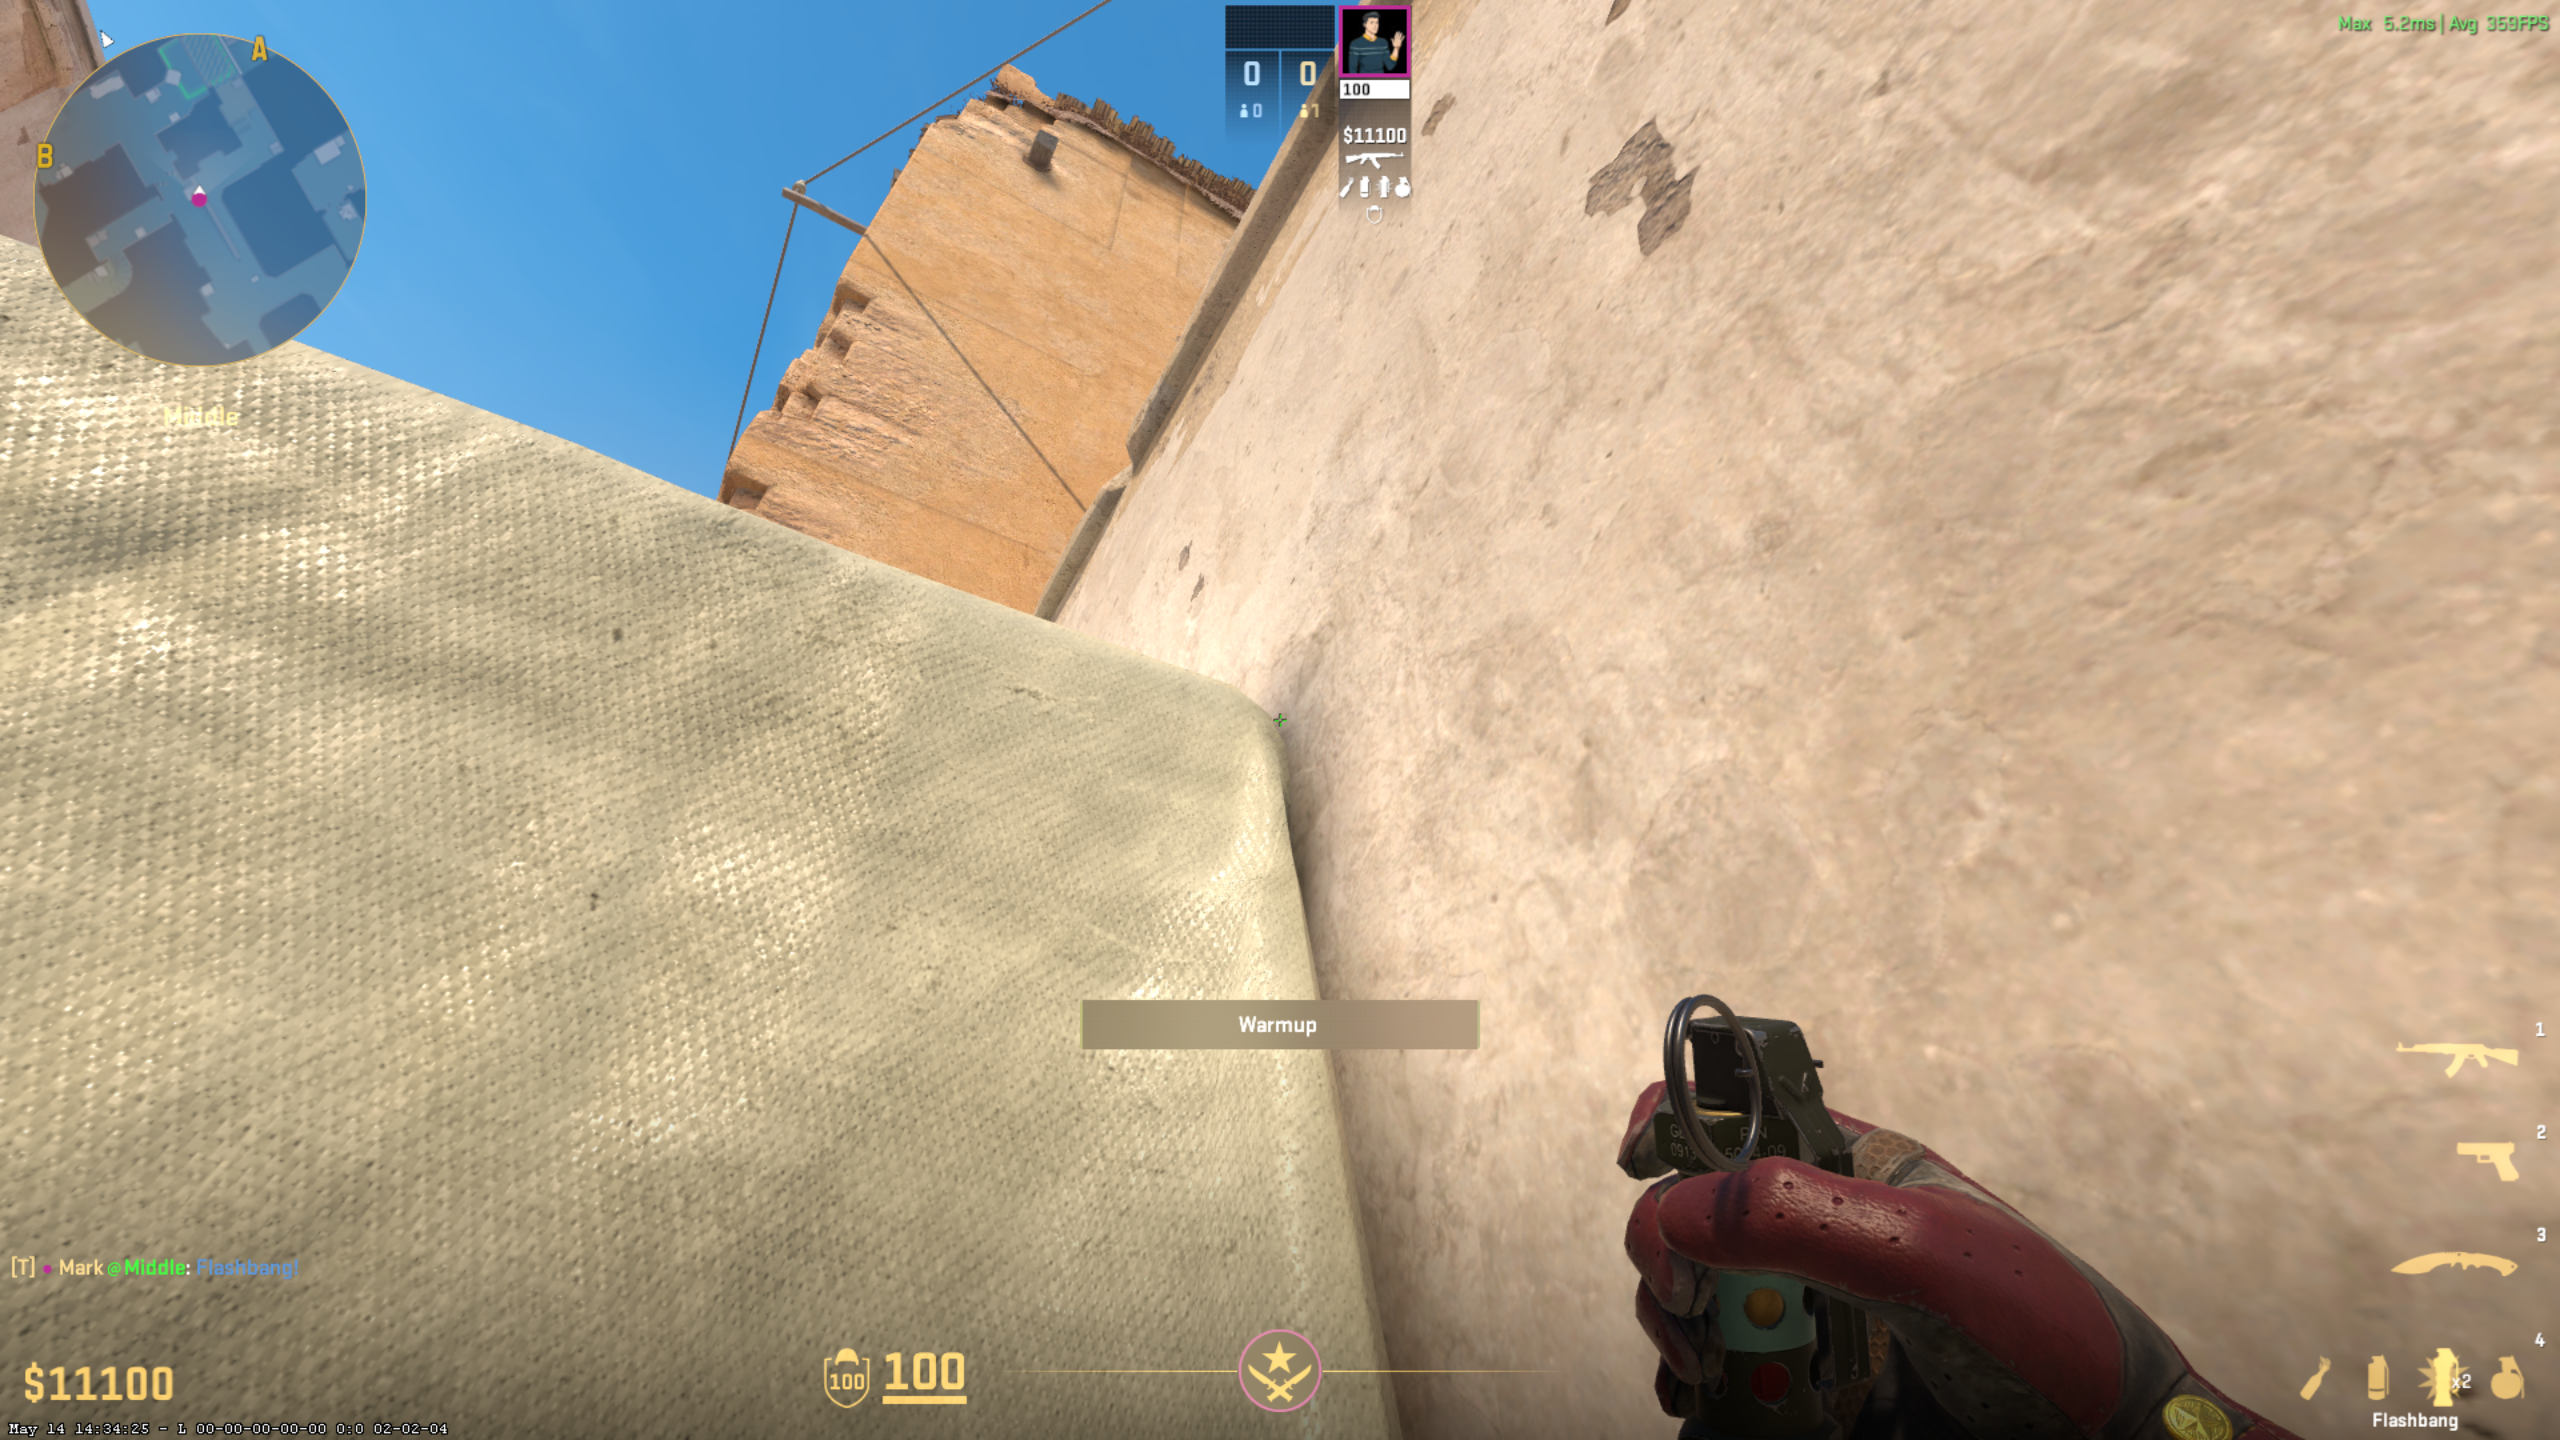
Mid to B Flash
🖼️
Save as mid-b-flash.png
🔍 Aim zoom
Stand
Xbox on mid — stand up, same corner as the smoke
Aim
Top-right corner of the green tarp covering Xbox — click 🔍 to zoom in
Throw
Left click throw — no jump needed
Effect
Flashes mid to B

A

A Long

2 Smokes · 1 Molotov
📍 Various positions
📍 Smoke 1 position — line up with the corner in T Spawn
A Long corner smoke position
🖼️
Save as long-corner-pos.png
1
Smoke
Long Corner
Jump Throw
Long Corner Smoke
🖼️
Save as long-smoke1.png
🔍 Aim zoom
Stand
T Spawn — line up with the corner of the wall
Aim
At the end of the pipe on the rooftop — click 🔍 to zoom in
Throw
Jump throw — hold LMB, jump, release on the way up
Lands
Covers the corner on Long, blocking the early CT peek
📍 Smoke 2 position — tuck into the corner between the blue skip and the wooden crate
A Cross smoke position
🖼️
Save as long-cross-pos.png
2
Smoke
A Cross
🖱 RL + Jump Throw
A Cross Smoke
🖼️
Save as long-smoke2.png
🔍 Aim zoom
Stand
Long Doors — tucked into the corner between the blue skip and the wooden crate
Aim
Below the elbow of the cable, to the right of the stain on the wall — click 🔍 to zoom in
Throw
Hold right + left click, jump and release mid-air
Lands
Smokes A Cross, covering the CT push across the site
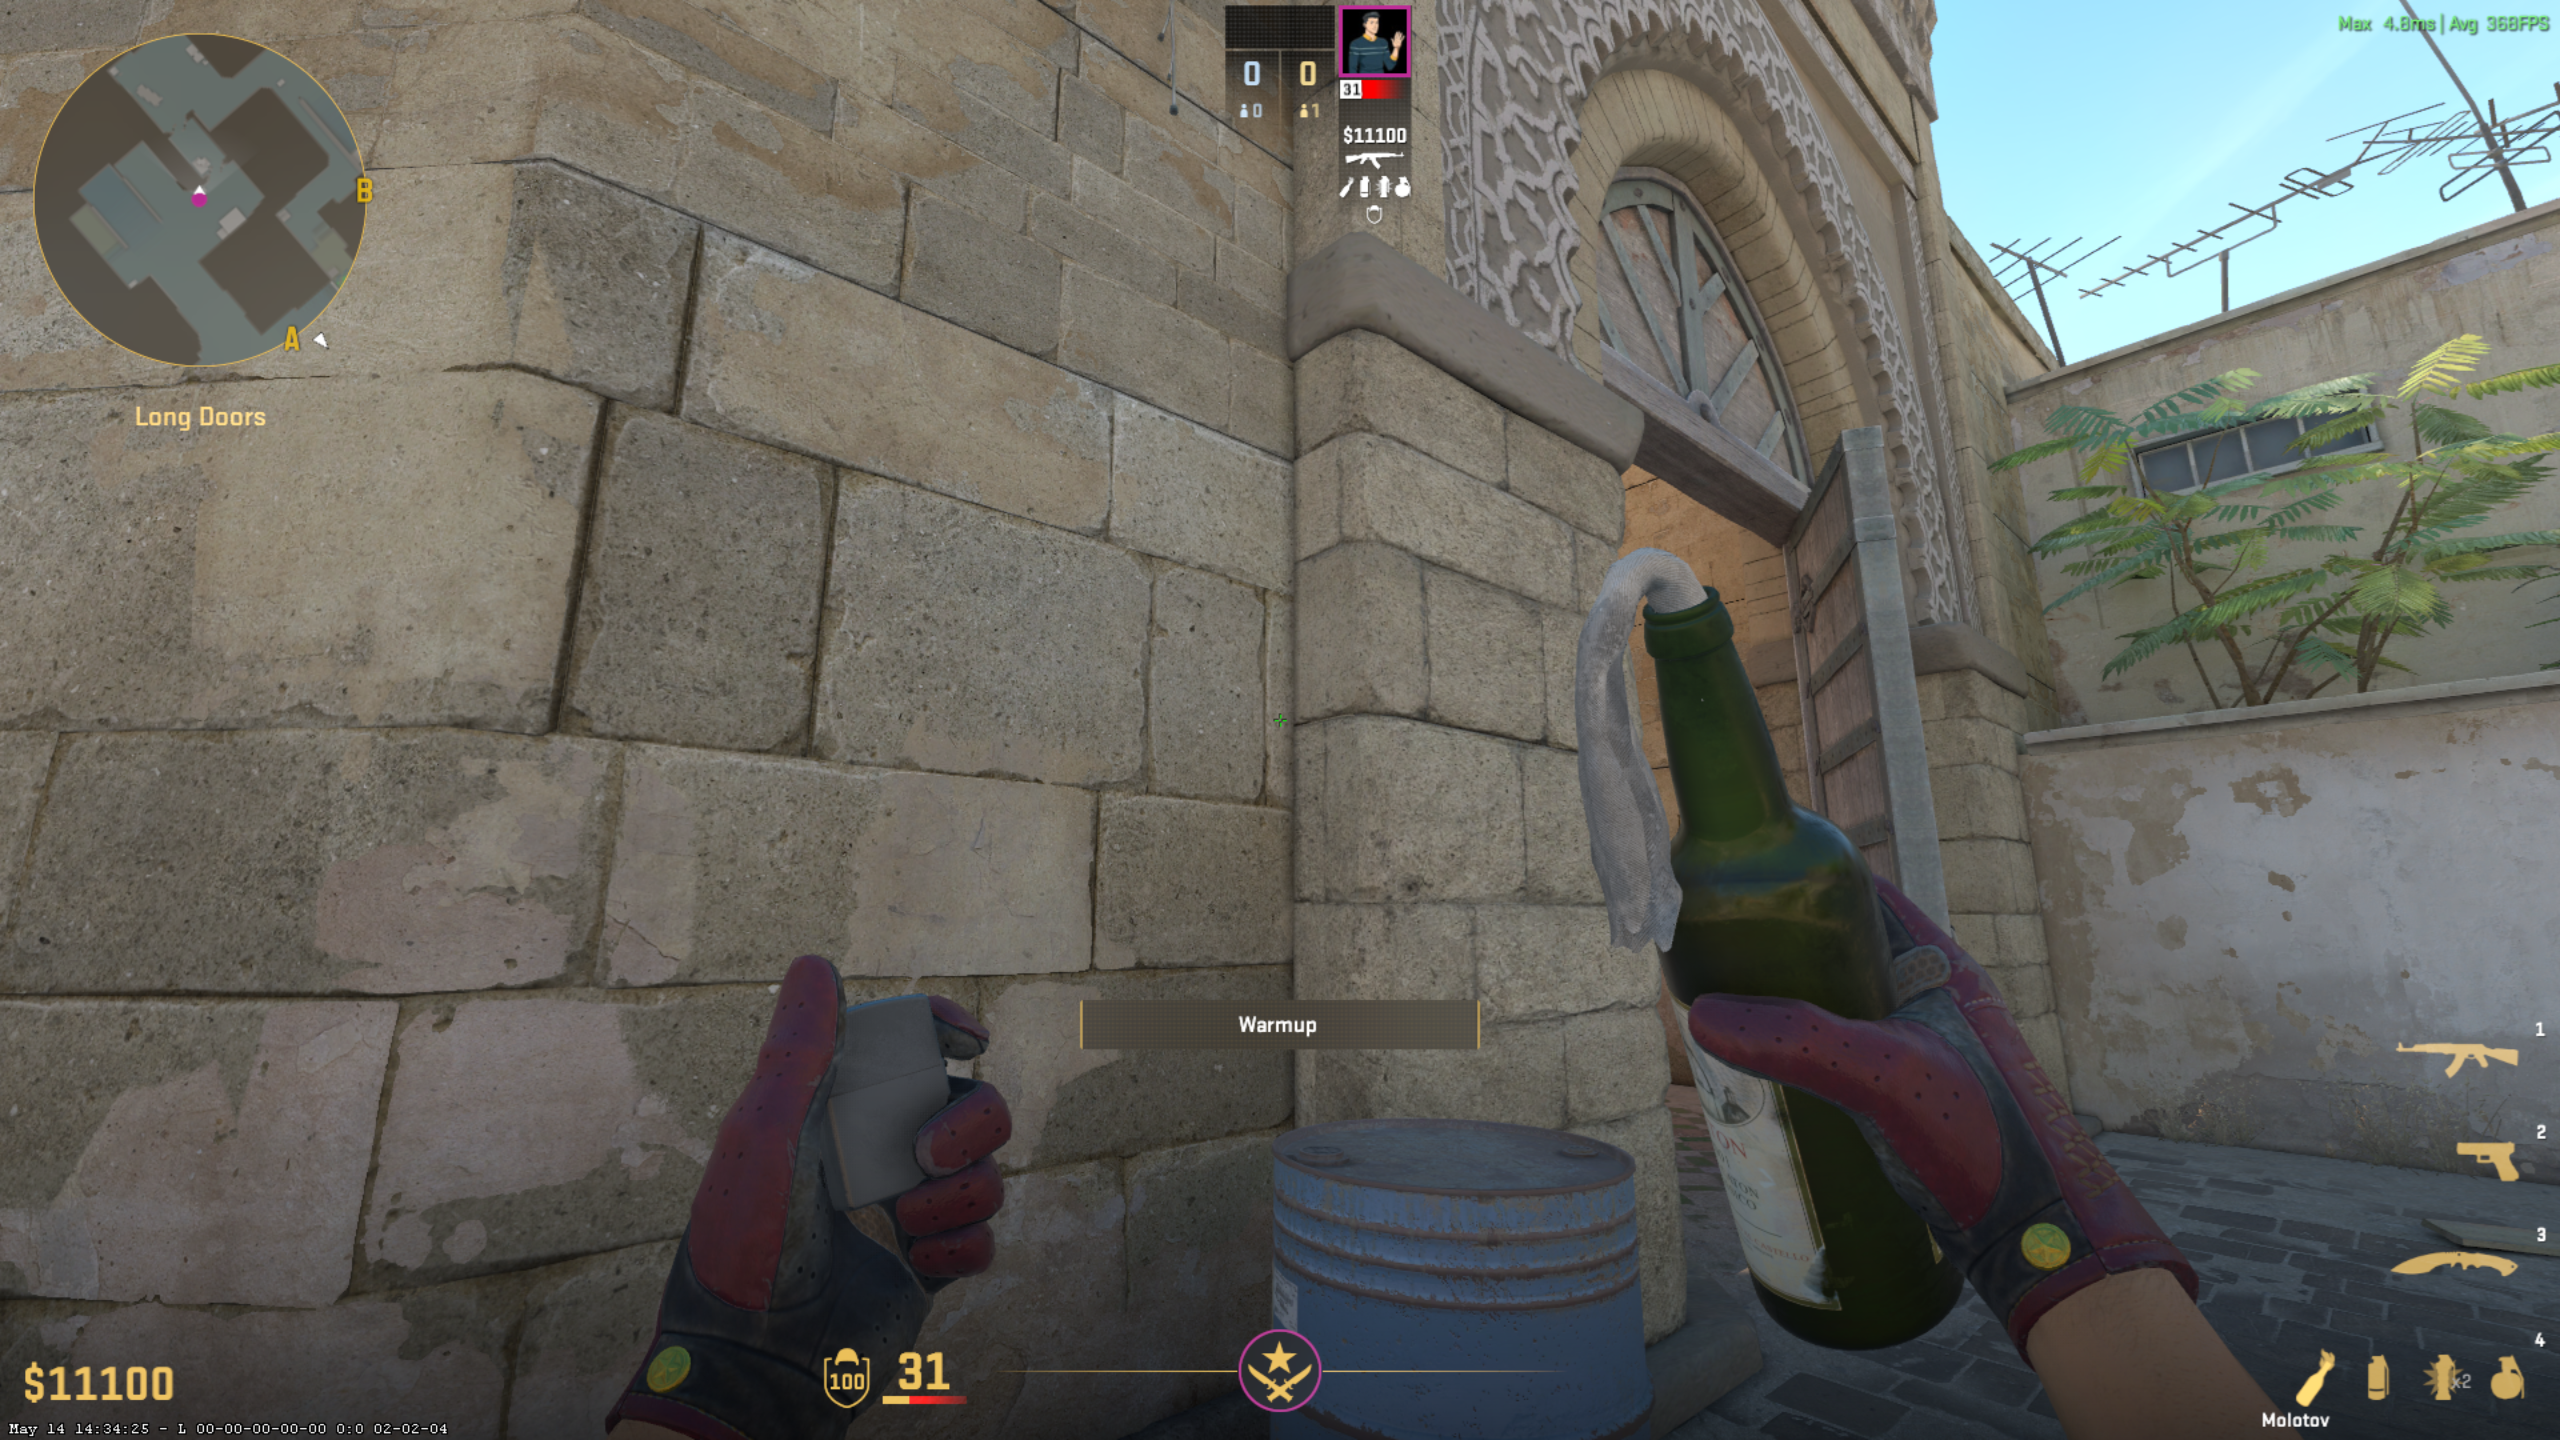
📍 Molotov position — climb on the barrel and tuck into the corner at Long Doors
Car molotov position
🖼️
Save as long-molotov-pos.png
3
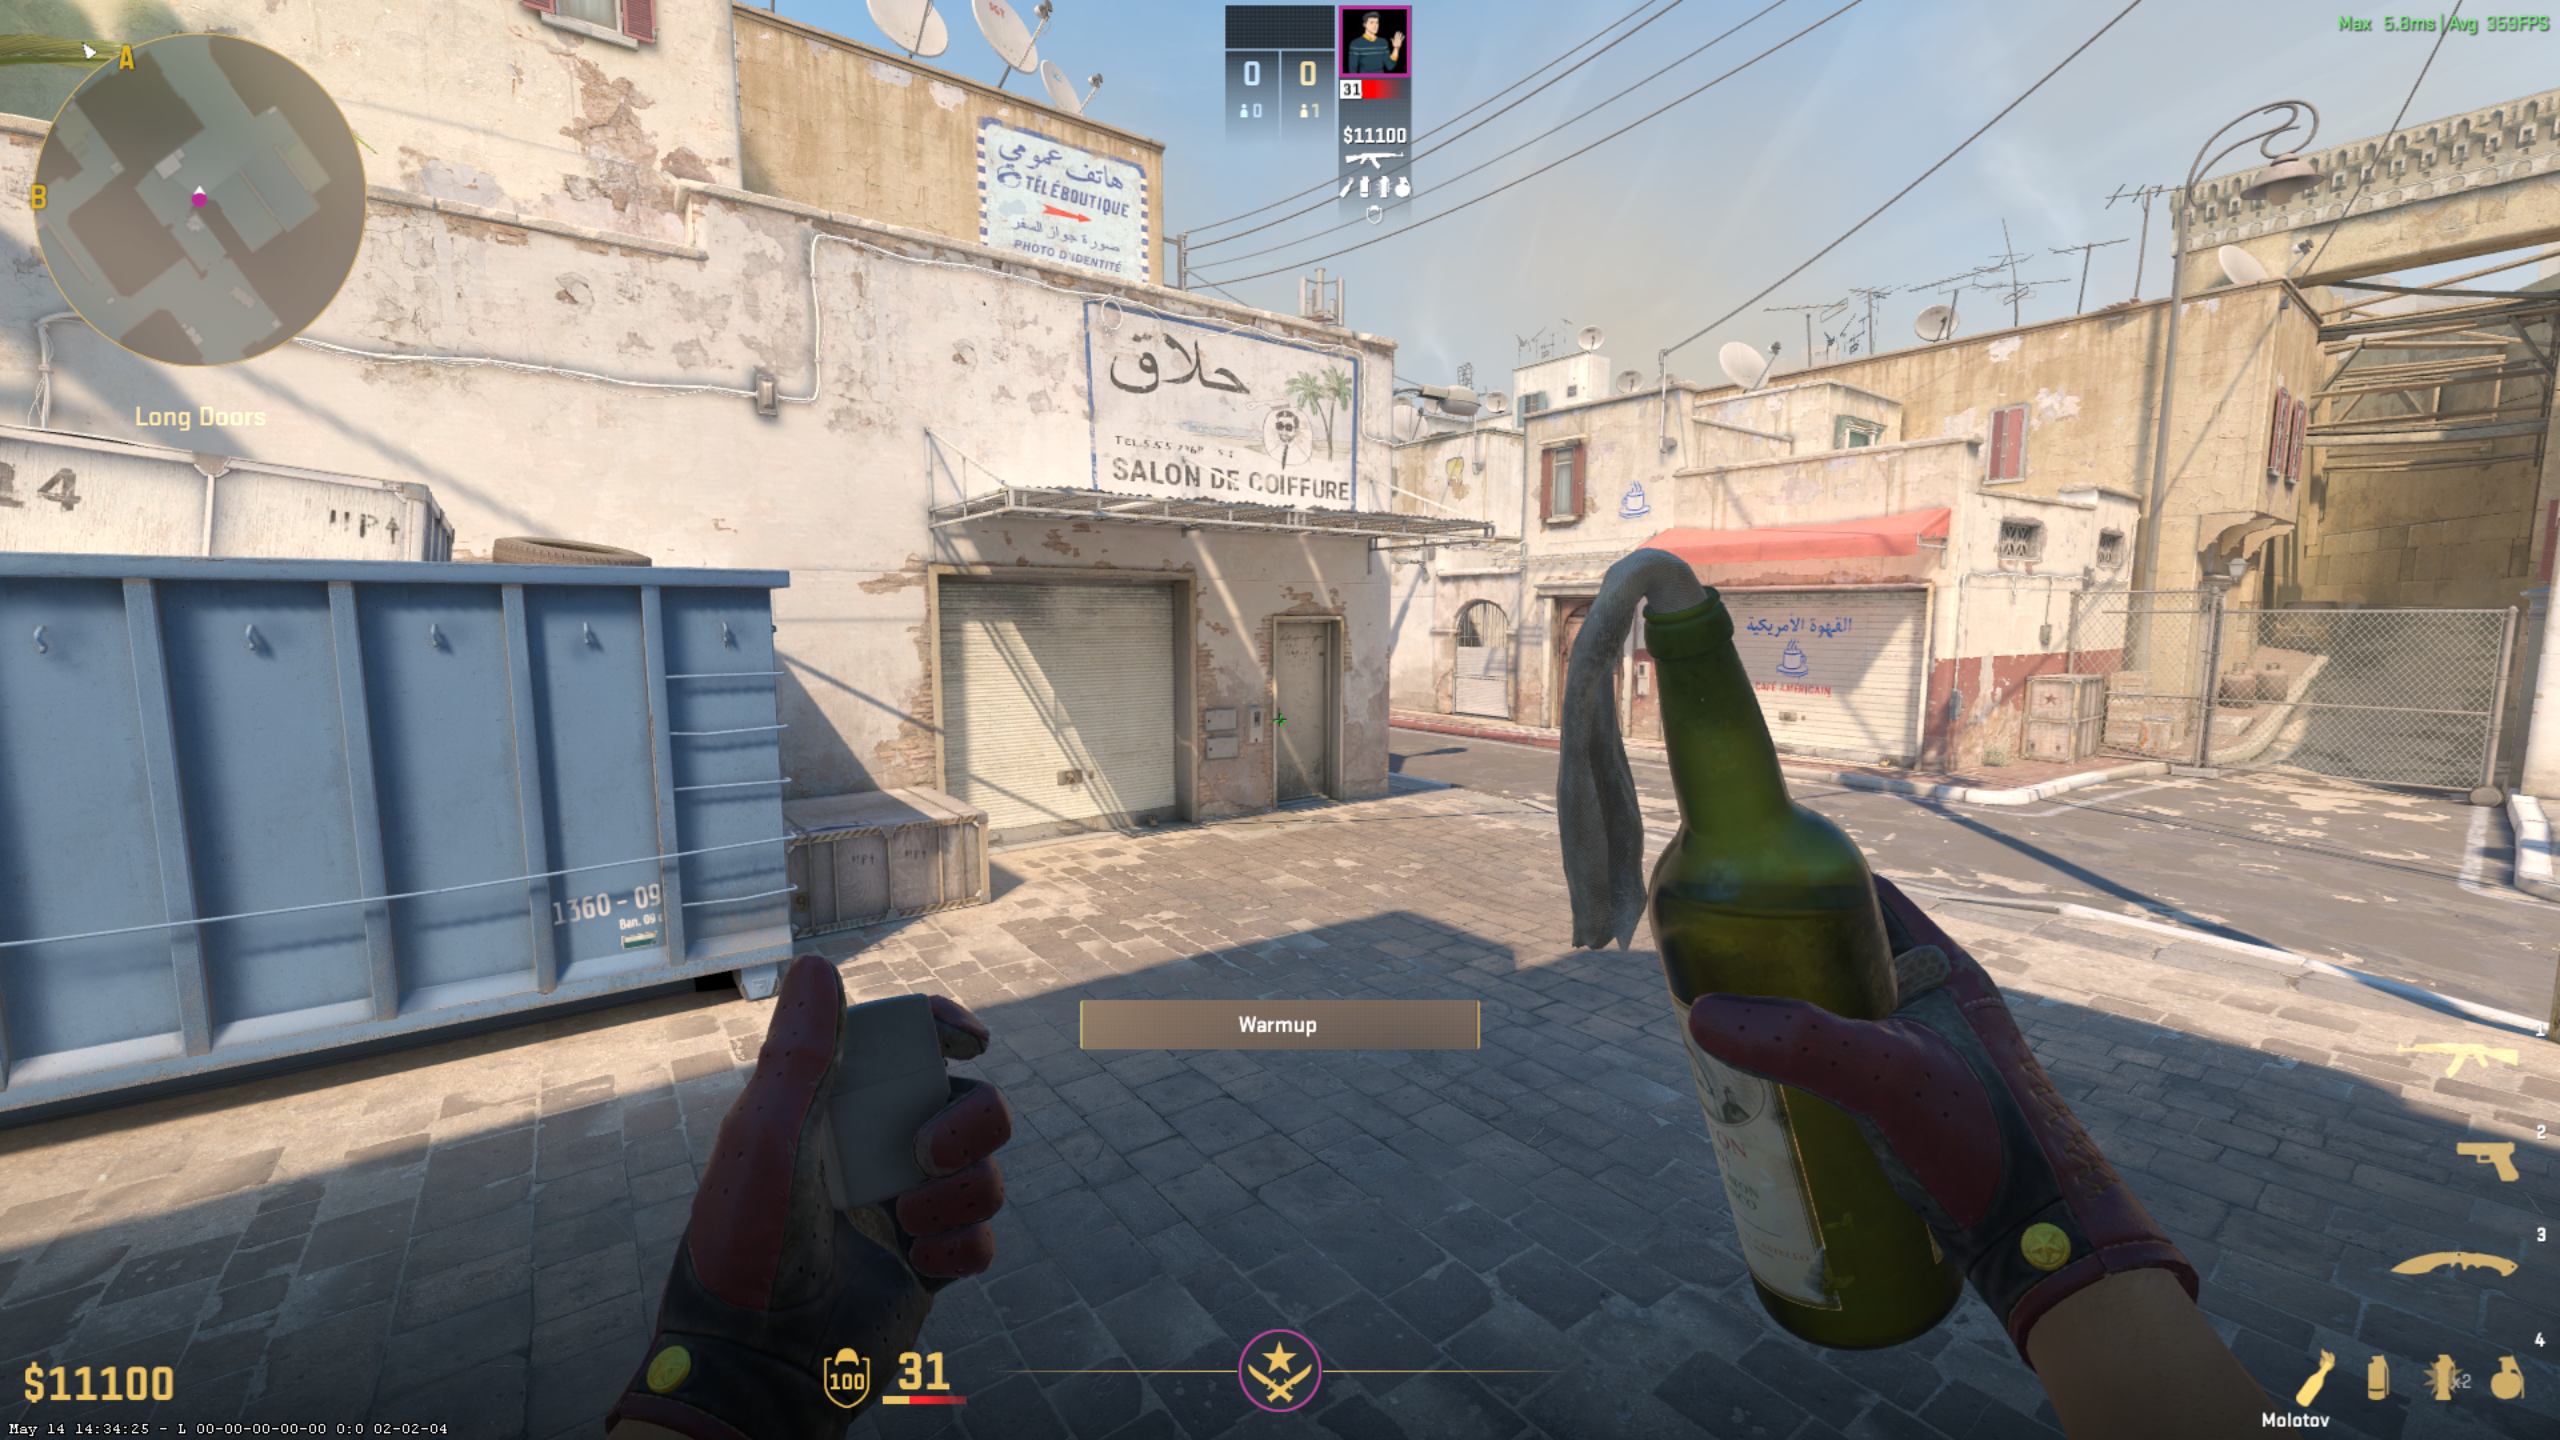
Molotov
Car
W + Jump Throw
Car Molotov
🖼️
Save as long-molotov.png
🔍 Aim zoom
Stand
Long Doors — climb on the barrel and tuck into the corner
Aim
At the latch on the garage door — click 🔍 to zoom in
Throw
W + jump throw — hold W and LMB, jump and release mid-air
Lands
Burns car on A Long